What is Vivaldi Browser?
Vivaldi is a fully customizable browser built for power users who value flexibility and control. Features like workspaces, tab stacks, and tab tiling help you manage tabs efficiently, while the built-in mail, calendar, and feed reader keep you organized. End-to-end encrypted sync ensures your data remains secure across devices. With Oculus Proxies, you can improve privacy, block trackers and ads, and access geo-restricted content effortlessly.How to Integrate Oculus Proxies With Vivaldi Browser
1
Install
Go to Vivaldi website and download the browser.
2
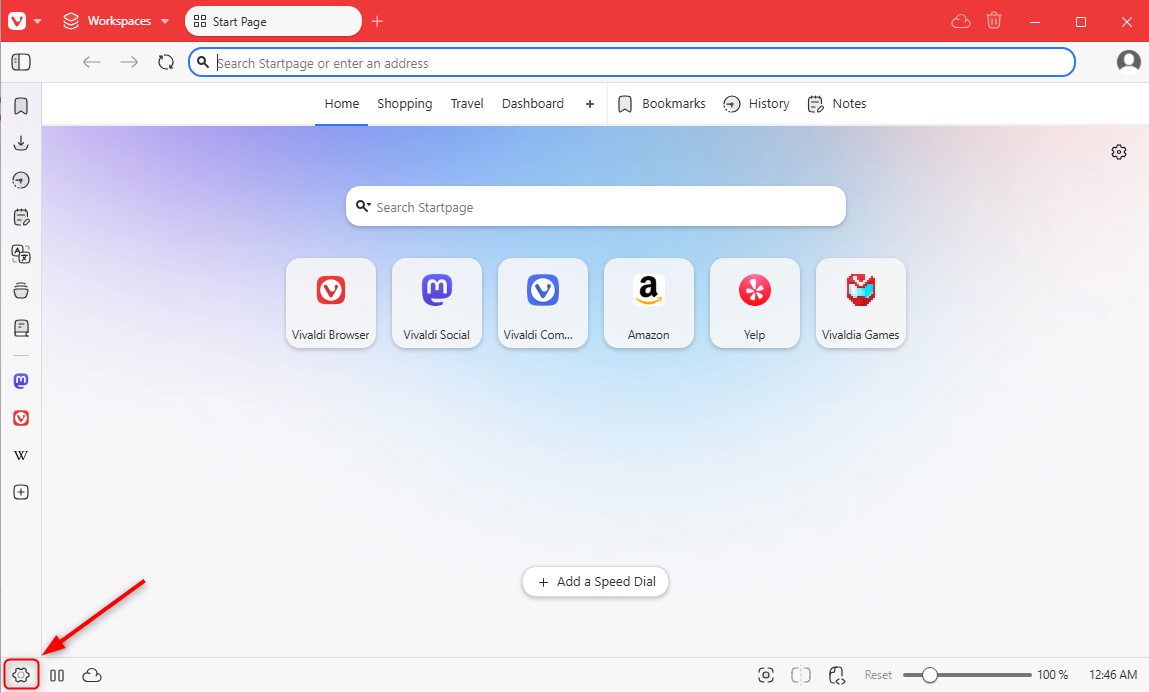
Browser Settings
Open Settings from the left sidebar at the bottom.

3
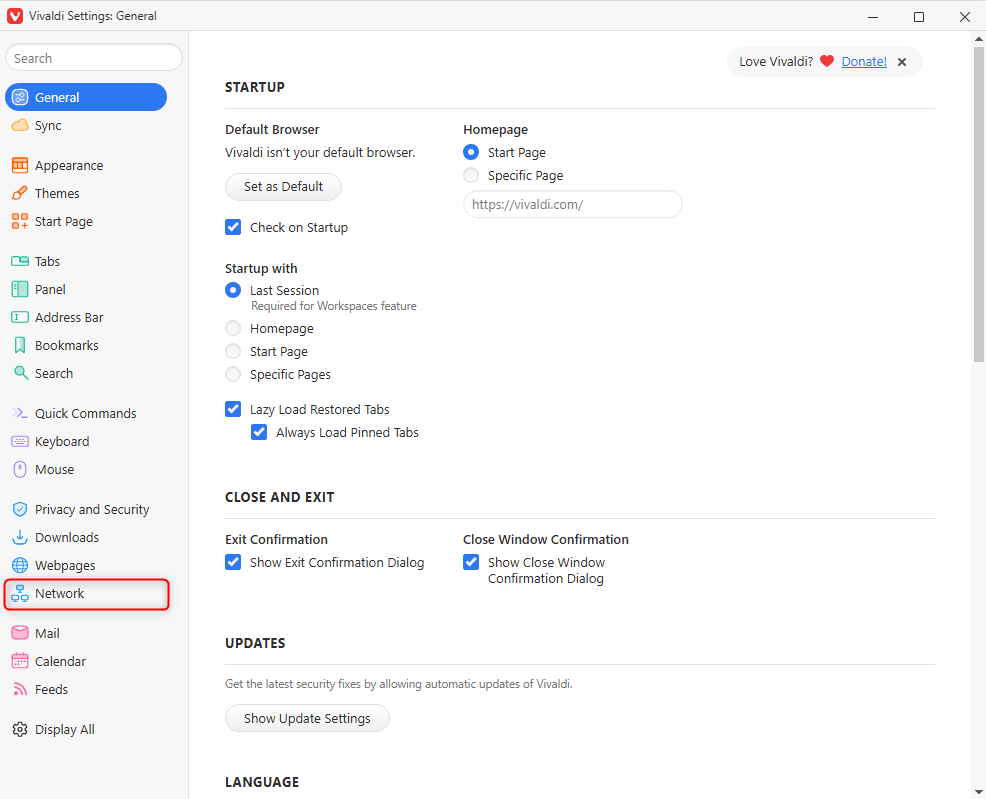
Network Settings
Navigate to the Network settings section.

4
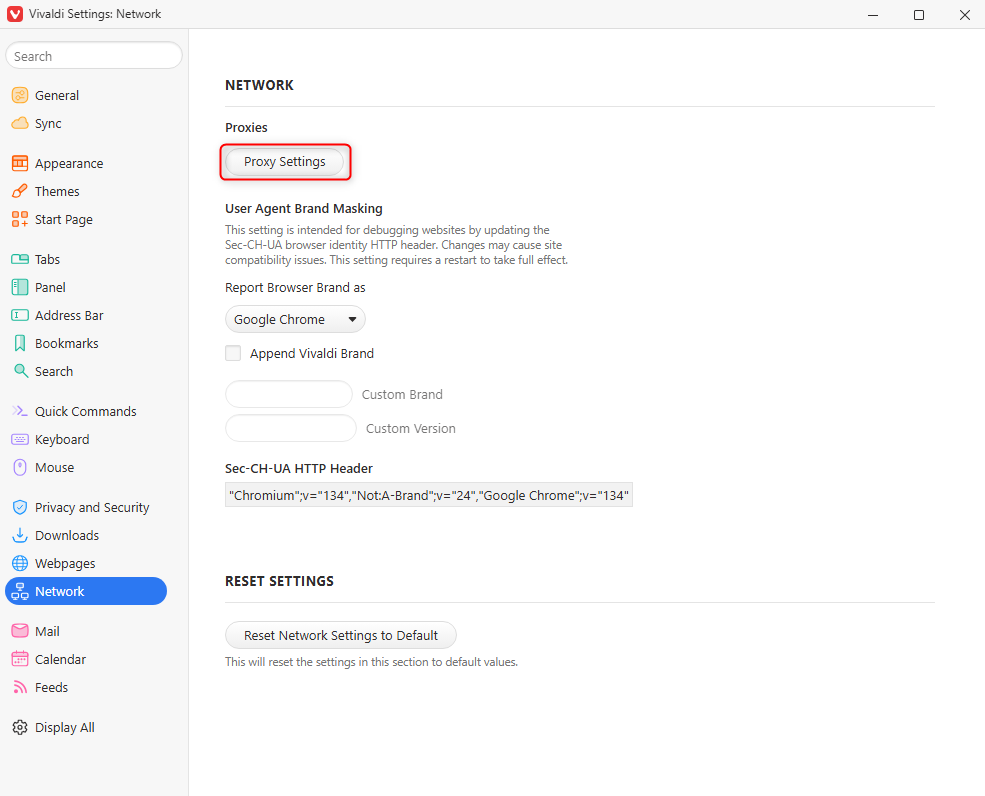
Proxy Settings
Click on Proxy settings to set up your connection.

5
Configure Proxy in Your Operating System
Vivaldi uses your system-wide proxy settings, so you’ll need to configure your proxies at the OS level. Follow the detailed setup guide based on your operating system:
- Windows
- macOS
Follow the step-by-step guide for Windows proxy configuration here.
6
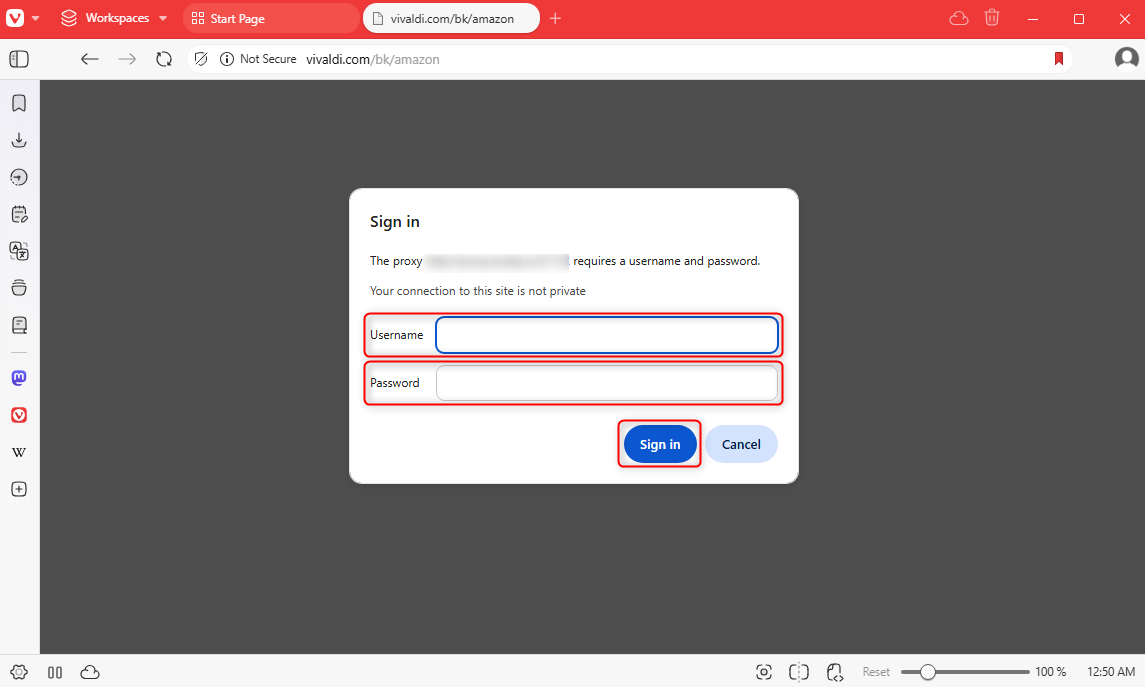
Enter Proxy Credentials
Enter your 
username and password, then click Sign in to save the changes.