What is Dolphin Anty?
Dolphin Anty is an advanced anti-detection browser designed for secure multi-account management. It enables users to create unique browser profiles with distinct digital fingerprints, preventing tracking systems from linking accounts. This makes it an ideal tool for:- Affiliate marketing
- E-commerce operations
- Social media management (SMM)
- Traffic arbitrage
- Cryptocurrency trading
How to Integrate Oculus Proxies With Dolphin Anty
Download and Install Dolphin Anty
1. Visit the Dolphin Anty website and download the application.2. Follow the installation instructions and launch the app.
Create and Log into Your Account
1. Open Dolphin Anty after installation.2. Sign up for a new account or log in with your existing credentials.
Create a New Browser Profile
1. Click + CREATE PROFILE to start setting up a new browser profile.


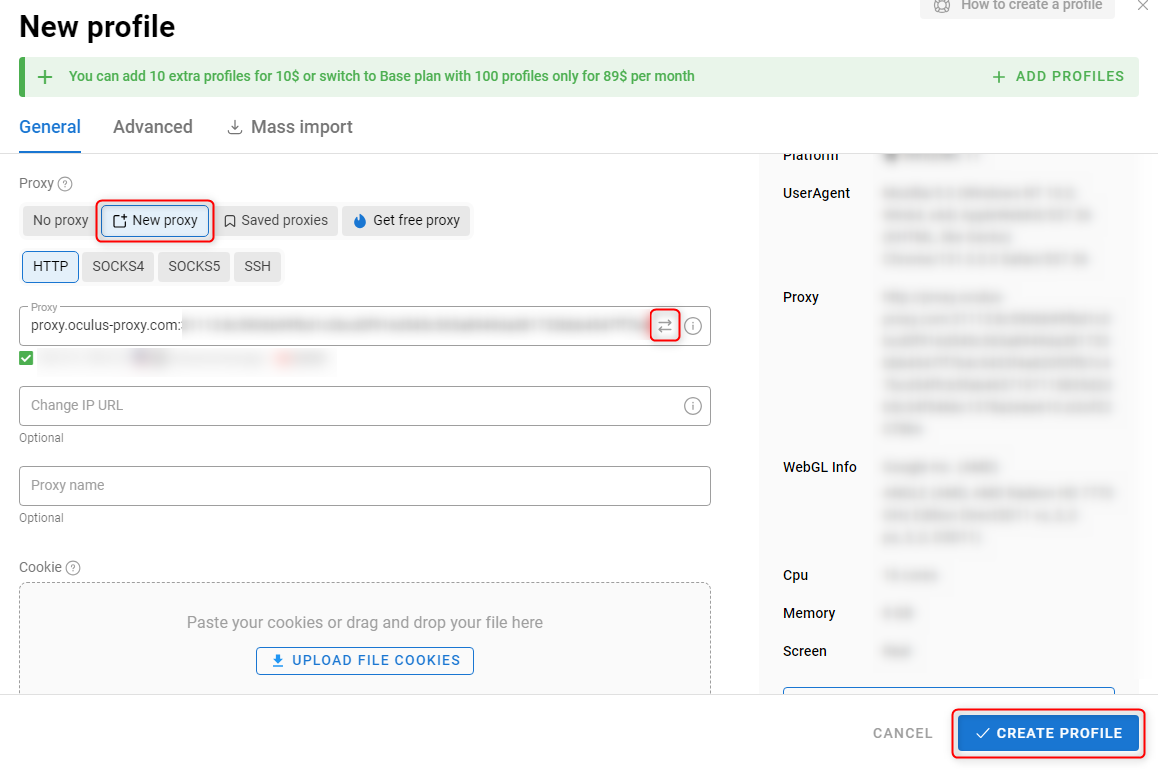
Configure Your Oculus Proxy
1. Click on the New Proxy tab within the profile setup.2. Open your Oculus Dashboard.3. Click Show Configured List and copy the proxy details from the Generic tab.4. Paste the copied proxy credentials into the Proxy field in Dolphin Anty.5. Click ⮂ Test Connection to verify that the proxy is working.6. Once verified, click CREATE PROFILE to save your setup.

