
What is AdsPower?
AdsPower is a powerful multi-account management tool designed for marketers, e-commerce sellers, and social media managers. It allows you to operate multiple accounts securely without the risk of detection or bans. Each browser profile in AdsPower has a unique digital fingerprint—including its own IP address, device type, and user agent—ensuring complete separation between accounts. Whether you’re scaling e-commerce stores, running social media campaigns, or managing affiliate marketing efforts, AdsPower makes handling multiple accounts seamless and secure.How to Integrate Oculus Proxies with AdsPower
1
Download and Install AdsPower
1. Visit the official AdsPower website.2. Download the installer for your operating system.3. Install and launch the AdsPower application.
2
Create a New Browser Profile
Open AdsPower and click the New Profile button to create a new browser profile.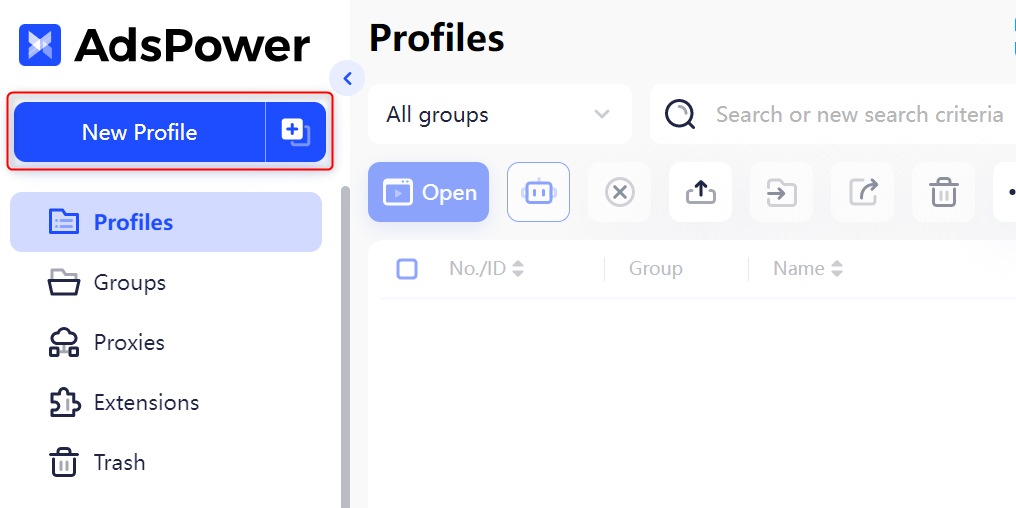
3
Configure Proxy Settings
1. In the profile setup, navigate to the Proxy Settings section.2. Enter your Oculus Proxy details as follows: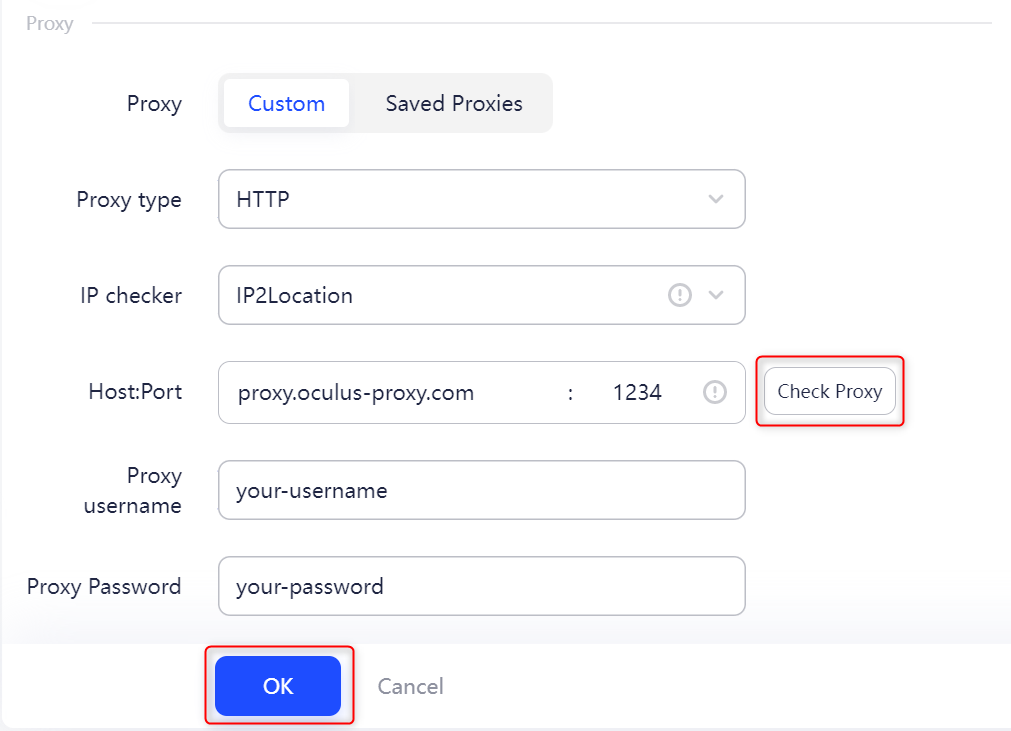
-
Proxy Type: Select
HTTP,HTTPS, orSOCKS5based on your proxy type. -
Proxy Host: Enter
proxy.oculus-proxy.com. - Proxy Port: Use the port number from your Oculus dashboard.
- Proxy Username: Enter your Oculus proxy username.
- Proxy Password: Enter your Oculus proxy password.
4
Launch the Browser with Your Proxy
1. In Profile Management, find the profile you created.2. Click Open under the Tags section to launch the browser with your configured proxy.