What is Incogniton?
Incogniton is an advanced anti-detect browser that allows you to manage multiple accounts securely from a single platform. It creates unique browser profiles, each with a distinct digital fingerprint, ensuring privacy and preventing detection. By integrating Oculus Proxies, you can enhance your anonymity, access geo-restricted content, and protect your accounts from bans.How to Integrate Oculus Proxies With Incogniton
Integrating Oculus Proxies with Incogniton ensures secure and undetectable browsing. Follow these steps to get started:1
Download and Install Incogniton
1. Visit the official Incogniton website.2. Download and install the browser for your operating system.3. Launch Incogniton and log in with your credentials.
2
Create a New Browser Profile
1. Navigate to the Profile Management section.2. Click New Profile to create a fresh browser session.

3
Configure Proxy Settings
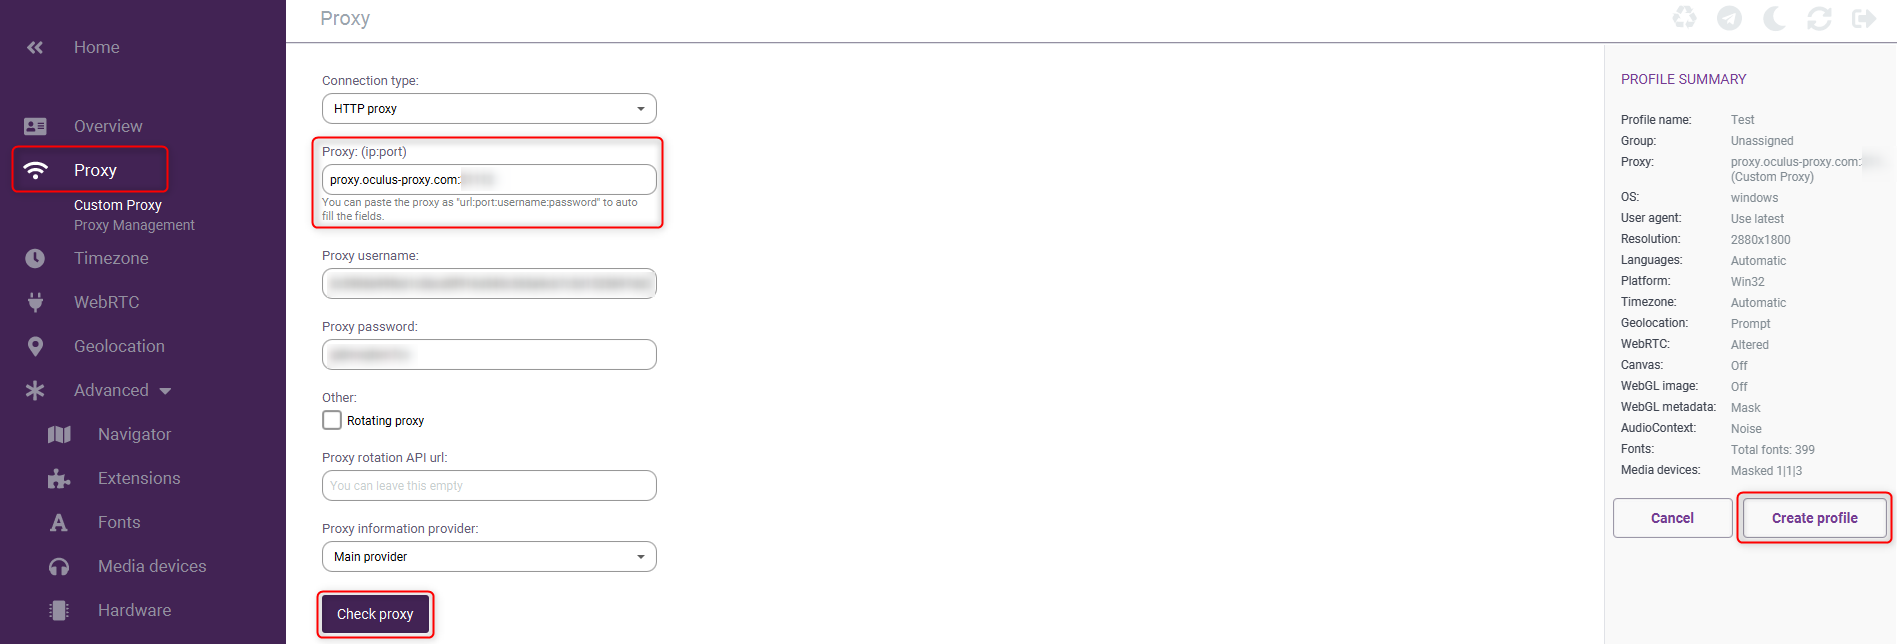
1. In the profile setup menu, go to the Proxy section.2. Log in to your Oculus Dashboard and click Show Configured List to view your proxy details.3. Copy the proxy code provided under the Generic tab.4. Go back to Incogniton and paste the copied proxy details into the Proxy field.5. Click Check Proxy to verify the connection.6. Once validated, click Create Profile to save the settings.

4
Start Browsing
1. Return to Profile Management.2. Select the newly configured profile.3. Click Start to launch a secure, anonymous browsing session.
