
Setting Up Proxies on Windows
Setting up a proxy server on Windows 10 and 11 is straightforward as both versions follow a similar process. Here’s a step-by-step guide to configure your system with Oculus Proxies:1
Open Network & Internet Settings
1. Press Windows + I to open the Settings app.2. Navigate to Network & Internet from the menu options.
2
Enable Automatic Detection
1. In the left sidebar, click on Proxy.2. Under the Automatic proxy setup section, toggle Automatically detect settings to On.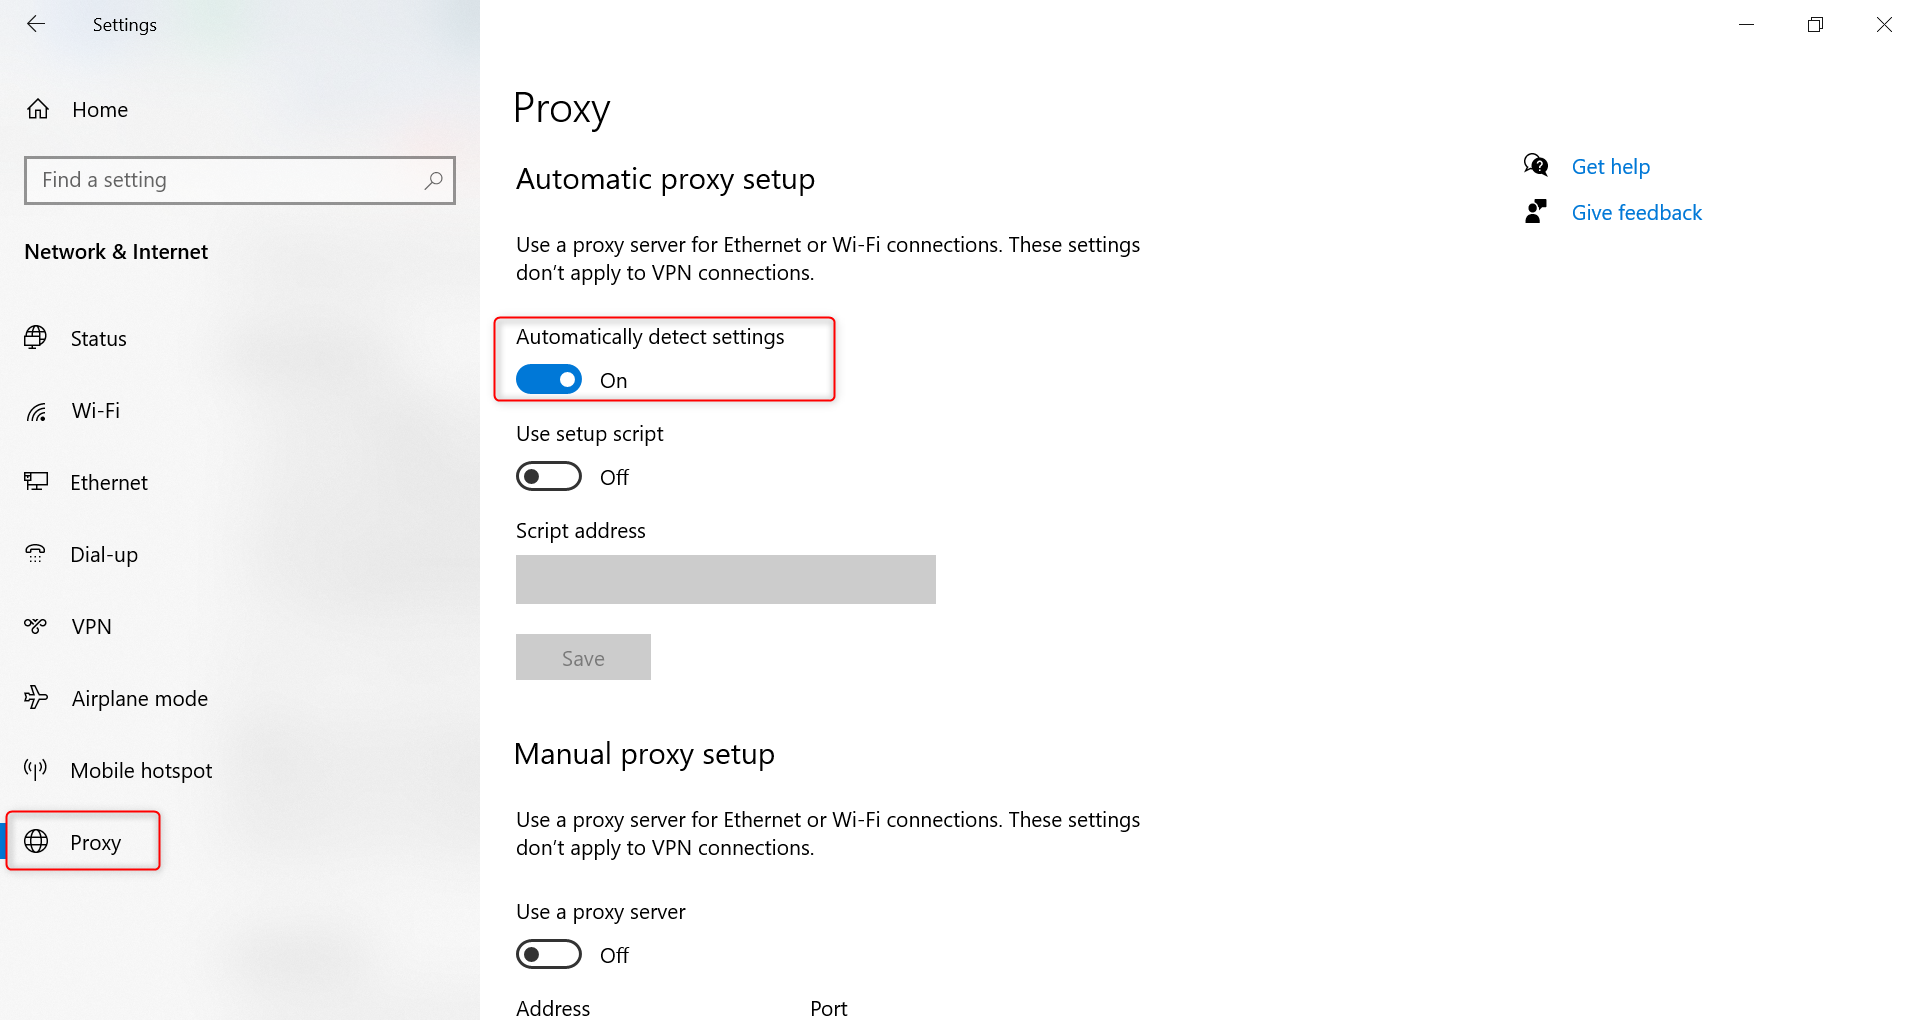
3
Configure Manual Proxy Settings
1. Scroll down to the Manual proxy setup section and toggle Use a proxy server to On.2. Fill in your Oculus Proxy details: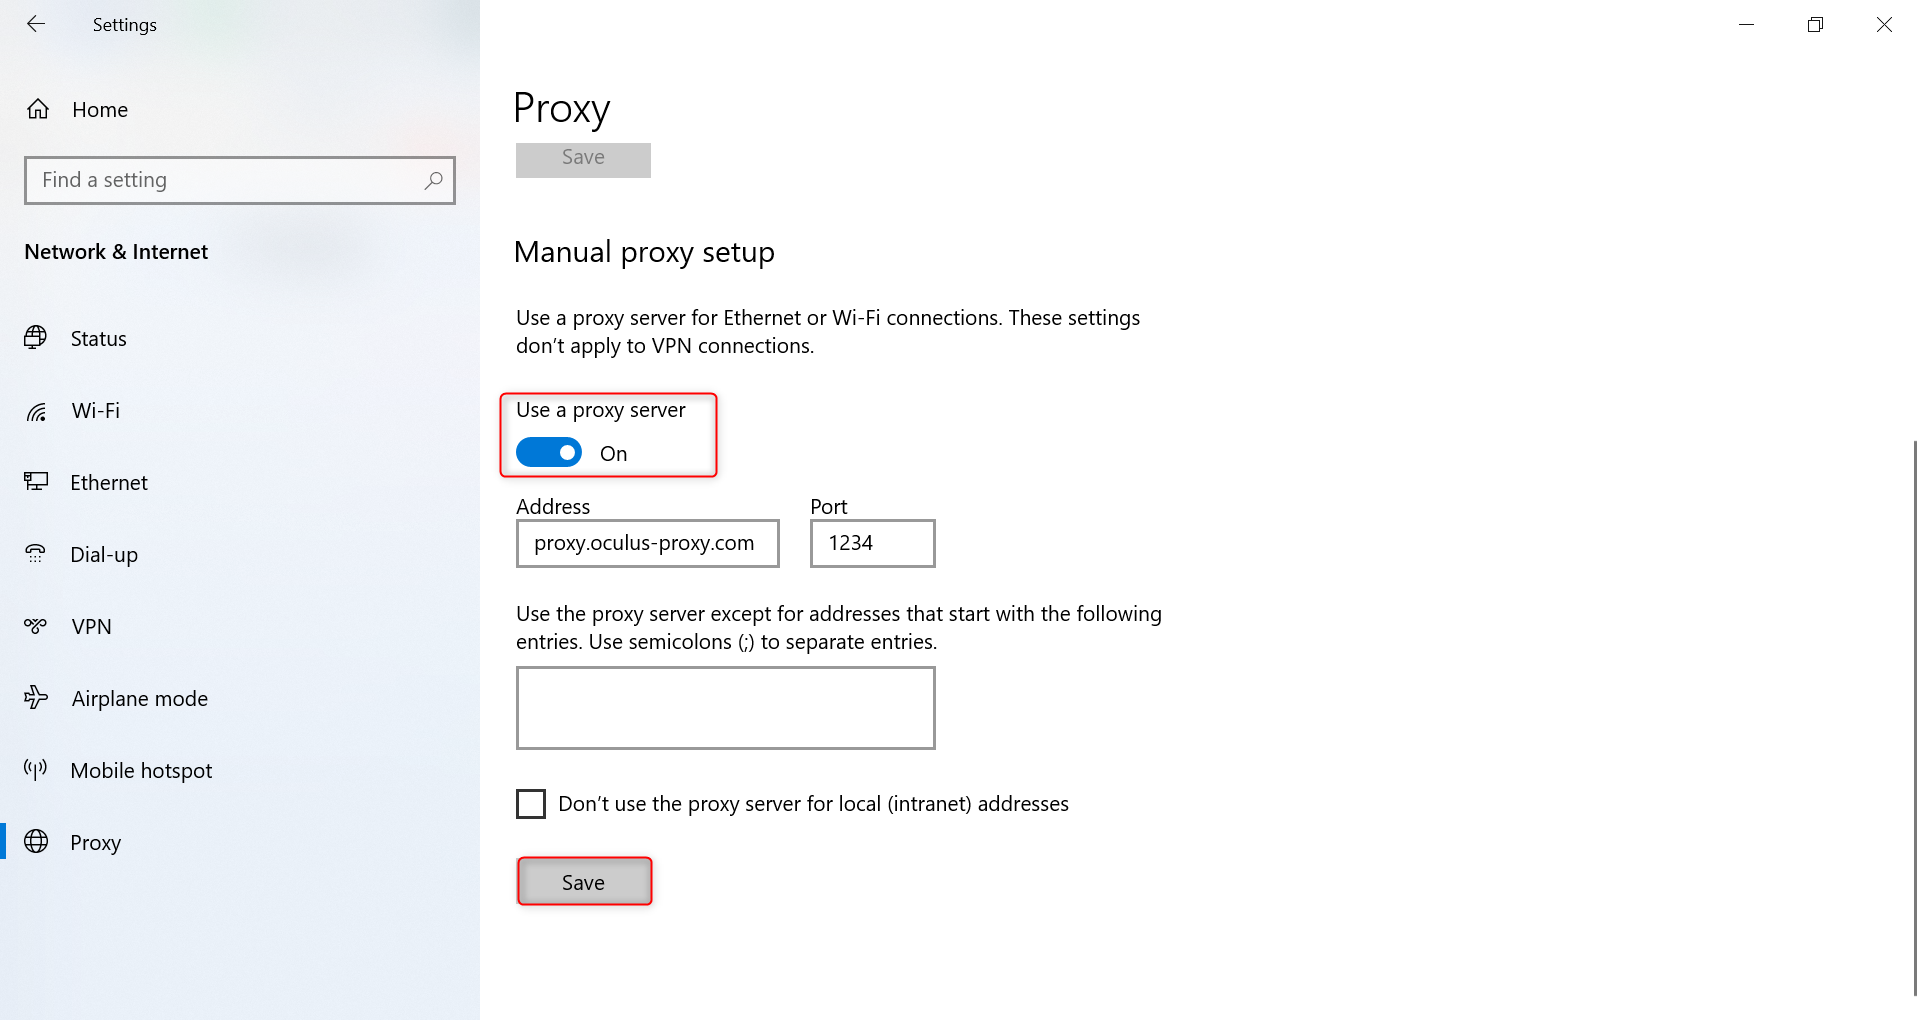
-
Address: Enter
proxy.oculus-proxy.com. - Port: Use the port number from your Oculus Dashboard.