What is Brave Browser?
Brave Browser is a privacy-focused web browser that stands out with its Shields feature—offering built-in protection against ads, trackers, fingerprinting, cookies, and more. Shields work by default, ensuring a secure browsing experience while allowing users to customize settings as needed. By combining Brave Browser with Oculus Proxies, you can further enhance your privacy, bypass geo-restrictions, and maintain anonymity while browsing the web. This powerful combination ensures a secure, ad-free, and unrestricted internet experience.How to Integrate Oculus Proxies with Brave Browser
1
Install
Install Brave Browser on your device.
2
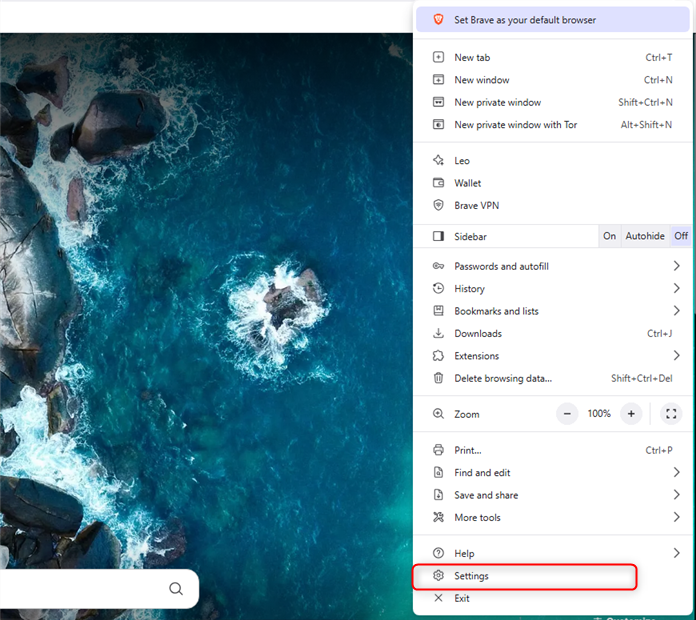
Access Settings
Open Brave and navigate to the browser’s Settings.

3
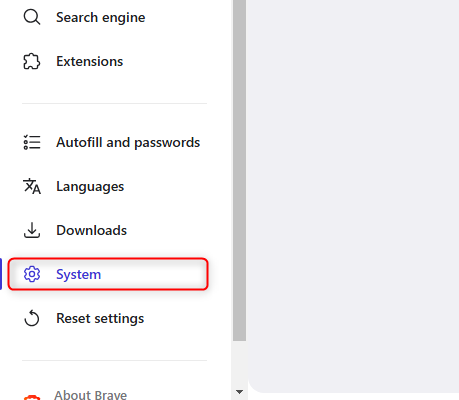
Go to System Settings
In the left menu, select System settings.

4
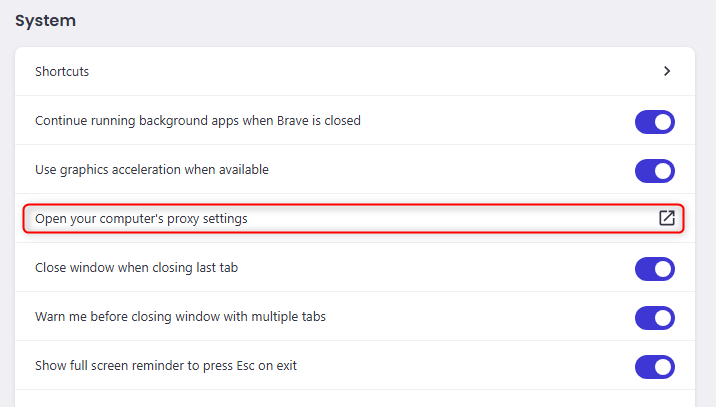
Go to Proxy Settings
Click Open your computer’s proxy settings to access system-level proxy configurations.

5
Configure Proxies in Your Operating System
- Windows
- macOS
Follow the step-by-step guide for Windows proxy configuration here.
6
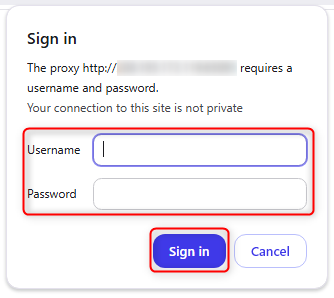
Authenticate Proxy
Return to Brave, and when prompted, enter your proxy 
Username and Password, then click Sign in.