What is Vision Browser?
Vision is a privacy-focused web browser that ensures security, anonymity, and ad-free browsing while preventing tracking. With built-in encryption, advanced blocking, and a VPN, it protects against data leaks and cyber threats. It supports extensions, customizable privacy settings, and proxy integration. Using Oculus Proxies, you can hide your IP, bypass geo-restrictions, and enhance security without sacrificing speed.How to Integrate Oculus Proxies With Vision Browser
1
Install Vision
Get Vision Browser and install it on your device.
2
New Folder
Launch the browser and click New Folder.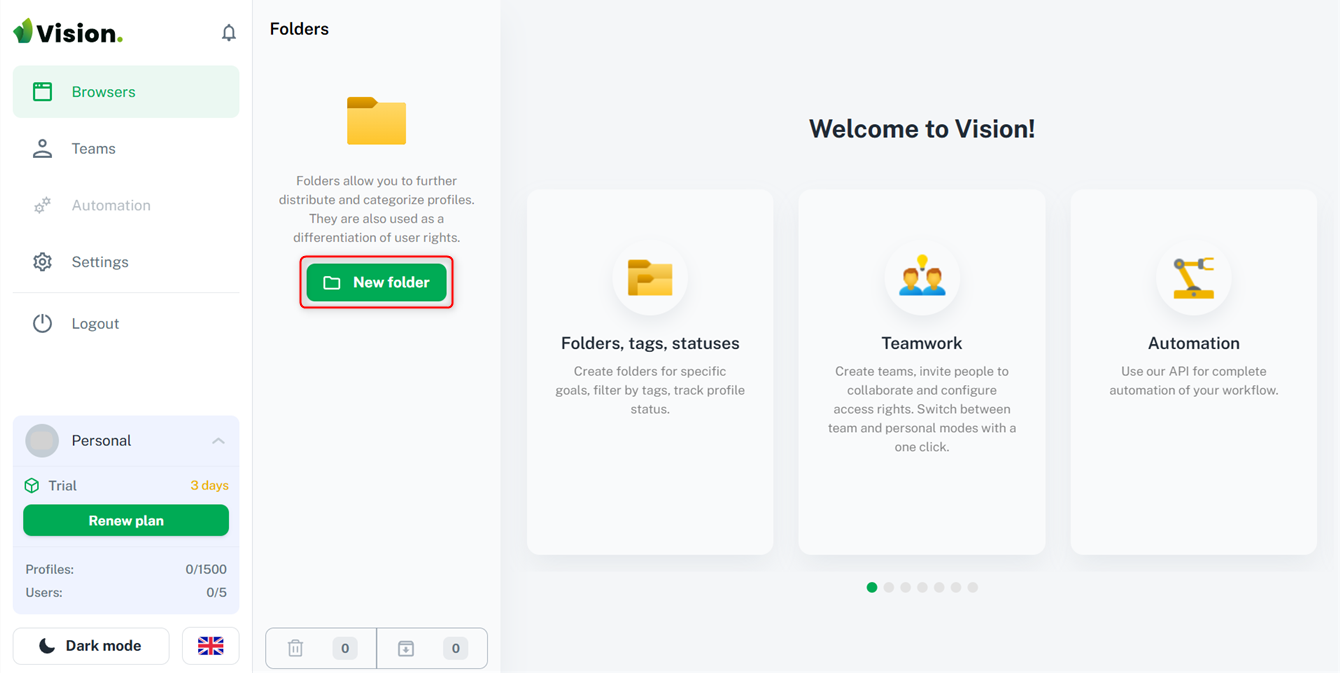
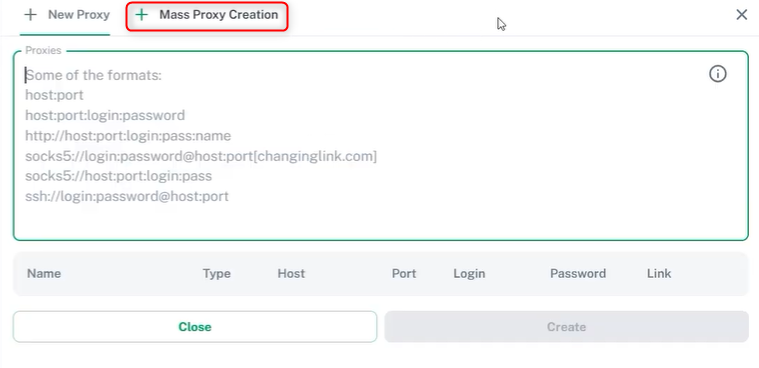
3
Add Proxy
Navigate to the Proxies tab and click Create First Proxy.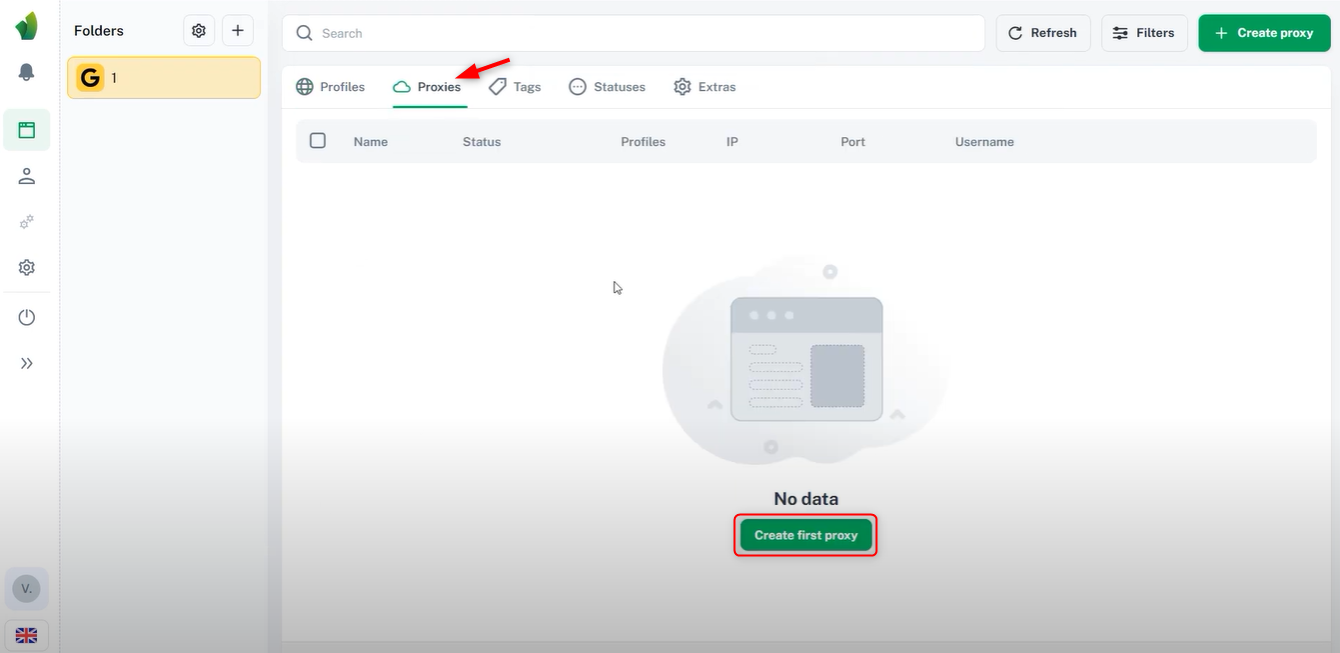
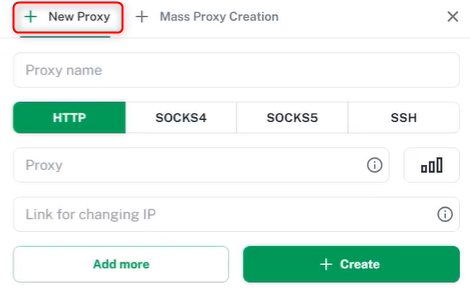
4
Configure Proxy
- Choose to create a single proxy or multiple proxies at once.
- Assign a name, select a protocol, and enter the proxy details in this format:
Host:IP:Username:Password. - Click +Create to save the proxy.
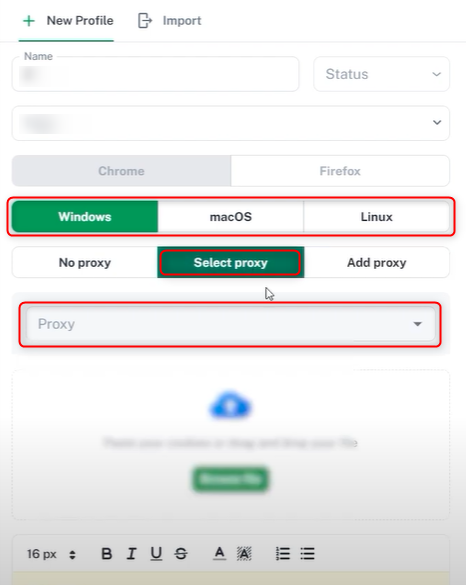
5
Set Up a Profile
Go to the Profiles tab and click Create First Profile.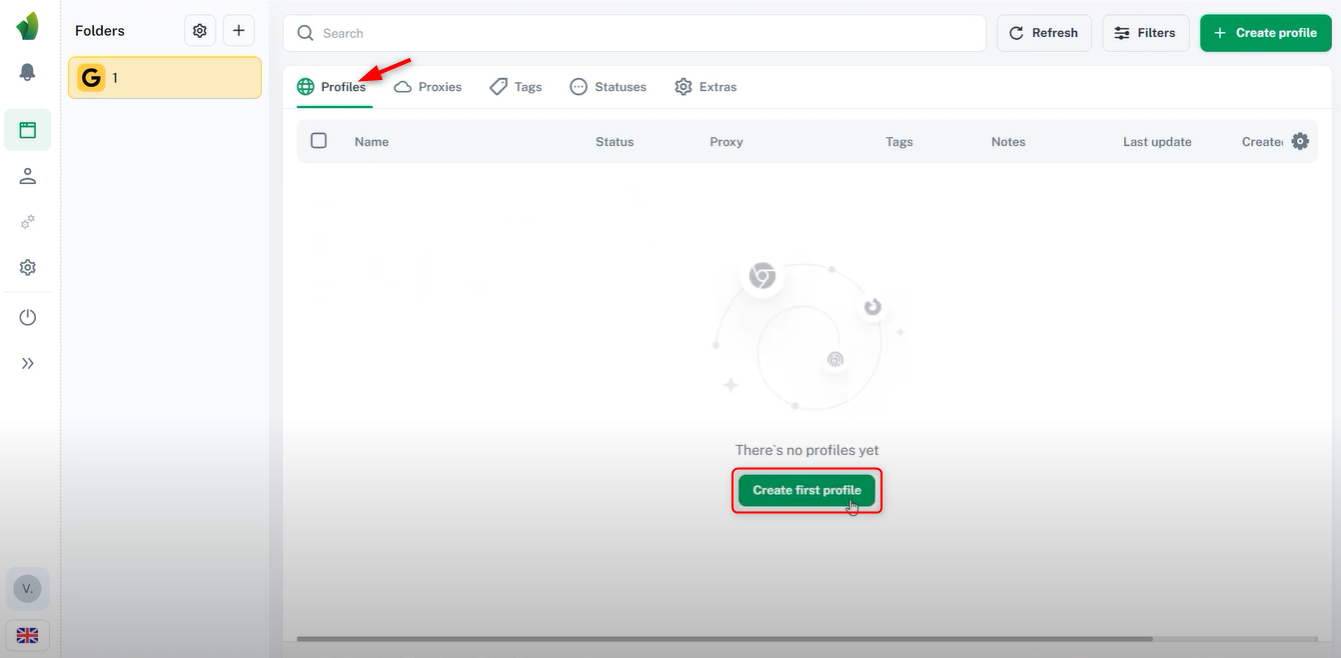
6
Assign Proxy
Enter a profile name, select an OS, and choose the newly created proxy from the list. Now your Vision Browser is set up with a proxy, ready for secure and private browsing!