How to Set Up Oculus Proxies With MoreLogin
Maximize your multi-account management! Integrating Oculus Proxies with MoreLogin ensures secure, anonymous browsing with enhanced protection against detection. Whether you’re managing social media profiles, running e-commerce accounts, or performing affiliate marketing tasks, this guide will walk you through the integration process step by step.
What is MoreLogin?
MoreLogin is an anti-detect browser designed to help users manage multiple online accounts on a single device. By creating unique browser profiles with separate IPs, cookies, and device fingerprints, it ensures your activities remain private and accounts undetectable.
With built-in proxy support and profile-sharing capabilities, MoreLogin is a go-to tool for social media management, e-commerce operations, and affiliate marketing tasks.
If you’re using Oculus to access search engines like Google, Bing, or Yandex and facing connection issues, the proxy type could be the reason. ISP Premium Proxies ensure stable and unrestricted access, preventing blocks that standard proxies might encounter. Switching to ISP Premium Proxies can help maintain smooth and reliable performance.
How to Integrate Oculus Proxies with MoreLogin
Download and Install MoreLogin
1. Visit the official MoreLogin website.
2. Download the application for your device.
3. Install and launch MoreLogin.
Create an Account or Log In
1. Sign up for a new account or log in with your existing credentials.
2. Once logged in, access the dashboard to create a new browser profile.
Create a New Browser Profile
1. Click the +New Profile button on the dashboard.
2. Enter a Profile Name to identify the profile.
3. Choose your preferred browser fingerprint settings and click Advanced Create to customize further.
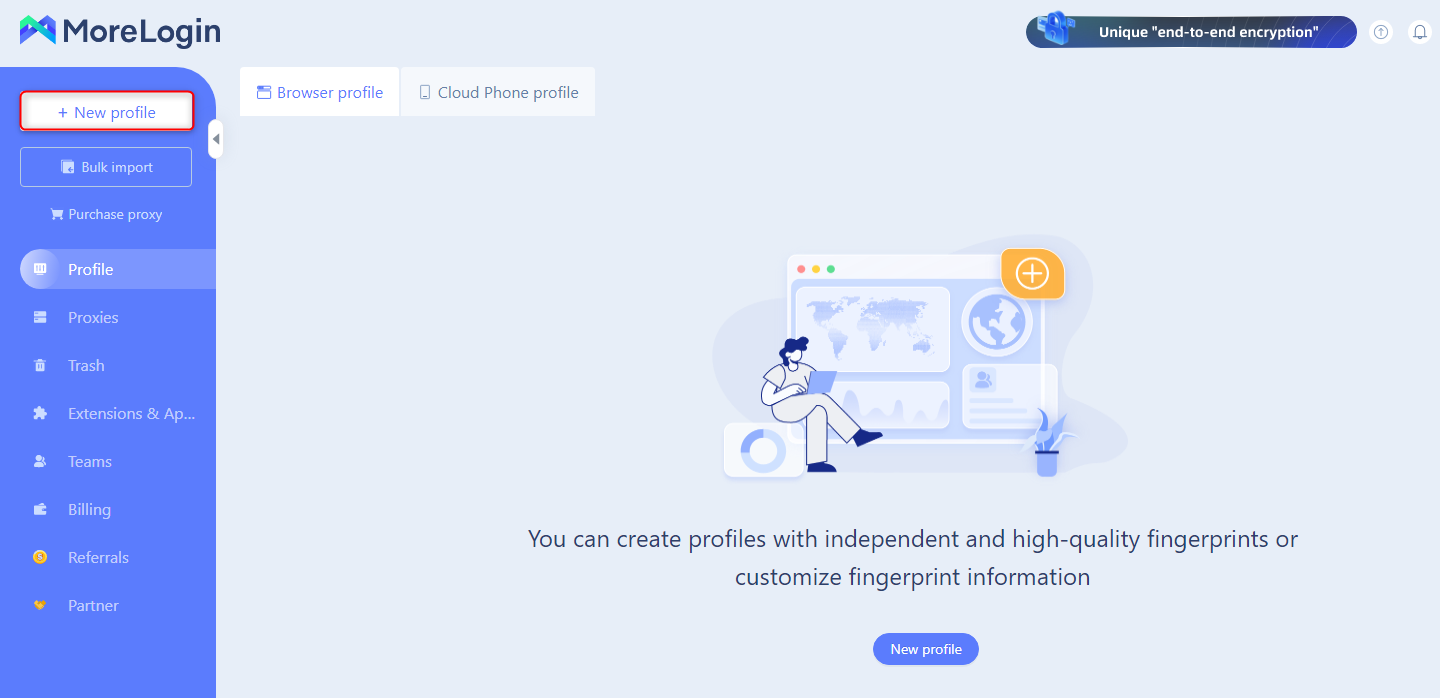
Configure Proxy Settings
1. Scroll to the Proxies section in the profile settings.
2. Enter your Oculus Proxy details as follows:
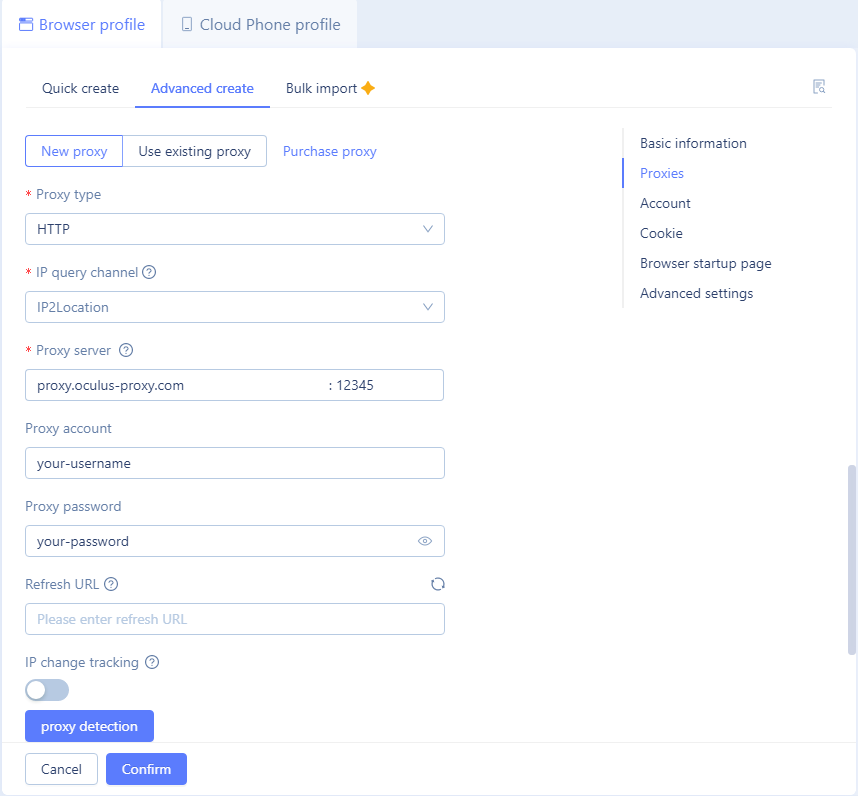
-
Proxy Type: Select
HTTP
,HTTPS
, orSOCKS5
based on your proxy type. -
Proxy Server:
proxy.oculus-proxy.com
. -
Proxy Port: Use the port number from your Oculus Dashboard.
-
Proxy Account: Your Oculus Proxy username.
-
Proxy Password: Your Oculus Proxy password.
3. Click Confirm to save the configuration.
You can also specify a country for your proxy. For instance, entering your-username-country-US
will give you a US-based exit node.
Launch the Profile
1. On the dashboard, select the profile you just created.
2. Click Start to launch a secure browsing session with your configured proxy.
You’re all set! You’ve successfully integrated Oculus Proxies with MoreLogin. Enjoy secure, private browsing and manage multiple accounts with ease.