What is BitBrowser?
BitBrowser is an anti-detect browser designed to help users manage multiple online accounts while maintaining anonymity. It creates isolated browser environments, ensuring that each profile remains independent and undetectable. It is widely used for:- E-commerce: Manage multiple storefronts across different platforms.
- Social Media Management: Handle multiple accounts without the risk of detection.
- Affiliate Marketing: Run campaigns securely without linking accounts.
How to Integrate Oculus Proxies with BitBrowser
1
Install and Open BitBrowser
1. Download BitBrowser from the official website: bitbrowser.net.2. Install the application on your device.3. Open BitBrowser and log in to your account.
2
Access Browser Profiles
1. On the home screen, click on the Browser Profiles tab.2. This section allows you to create and manage browser profiles.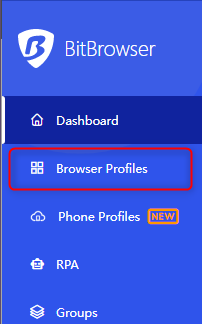
3
Create a New Browser Profile
1. Click the + Add button to create a new browser profile.2. Customize the profile settings according to your needs.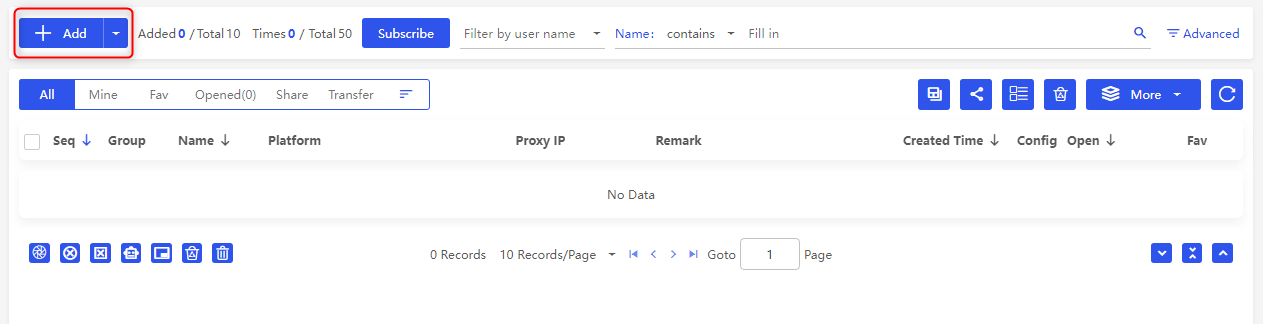
4
Configure Proxy Settings
1. Scroll down to the Proxy section in the profile settings.2. Enter your Oculus Proxy details: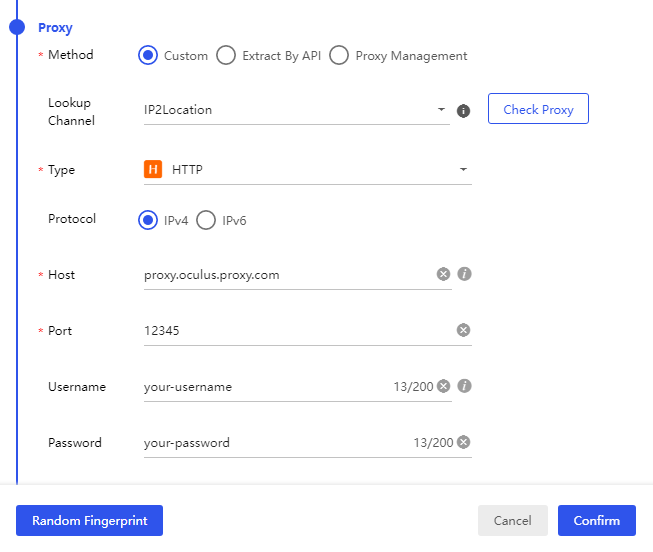
-
Type: Select
HTTP,HTTPS, orSOCKS5. -
Host:
proxy.oculus-proxy.com - Port: Use the port number from your Oculus dashboard.
- Username: Your Oculus proxy username.
- Password: Your Oculus proxy password.
5
Test the Proxy
1. Click the Check Proxy button to verify the connection.2. If the connection is successful, click Confirm to save the settings.
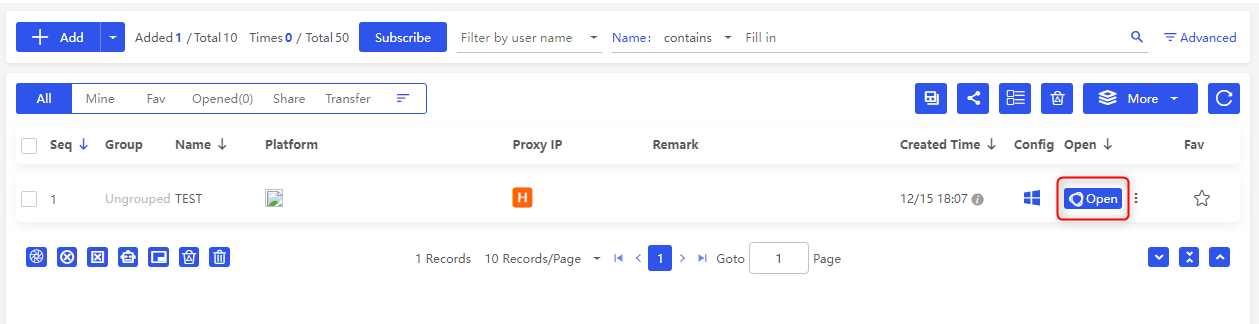
6
Launch the Browser and Verify the Proxy
1. After saving the profile, click Open to launch the browser with your configured proxy settings.2. Visit an IP-checking website (e.g., ipinfo.io) to confirm that your proxy is active.