
What is Logii Browser?
Logii Browser is a privacy-focused anti-detect browser designed for online professionals, including affiliate marketers, e-commerce sellers, and social media managers. It helps users stay hidden, protect their identity, and manage multiple accounts without detection. With features like secure browsing, automation capabilities, proxy support, and anti-fingerprinting technology, Logii ensures a seamless and undetectable experience. By integrating Oculus Proxies, you can further enhance privacy, access geo-restricted content, and maintain a stable browsing environment.How to Set Up Oculus Proxies in Logii Browser
1
Install
Download and install Logii.
2
Profile Manager
Open the browser and navigate to the Profiles section.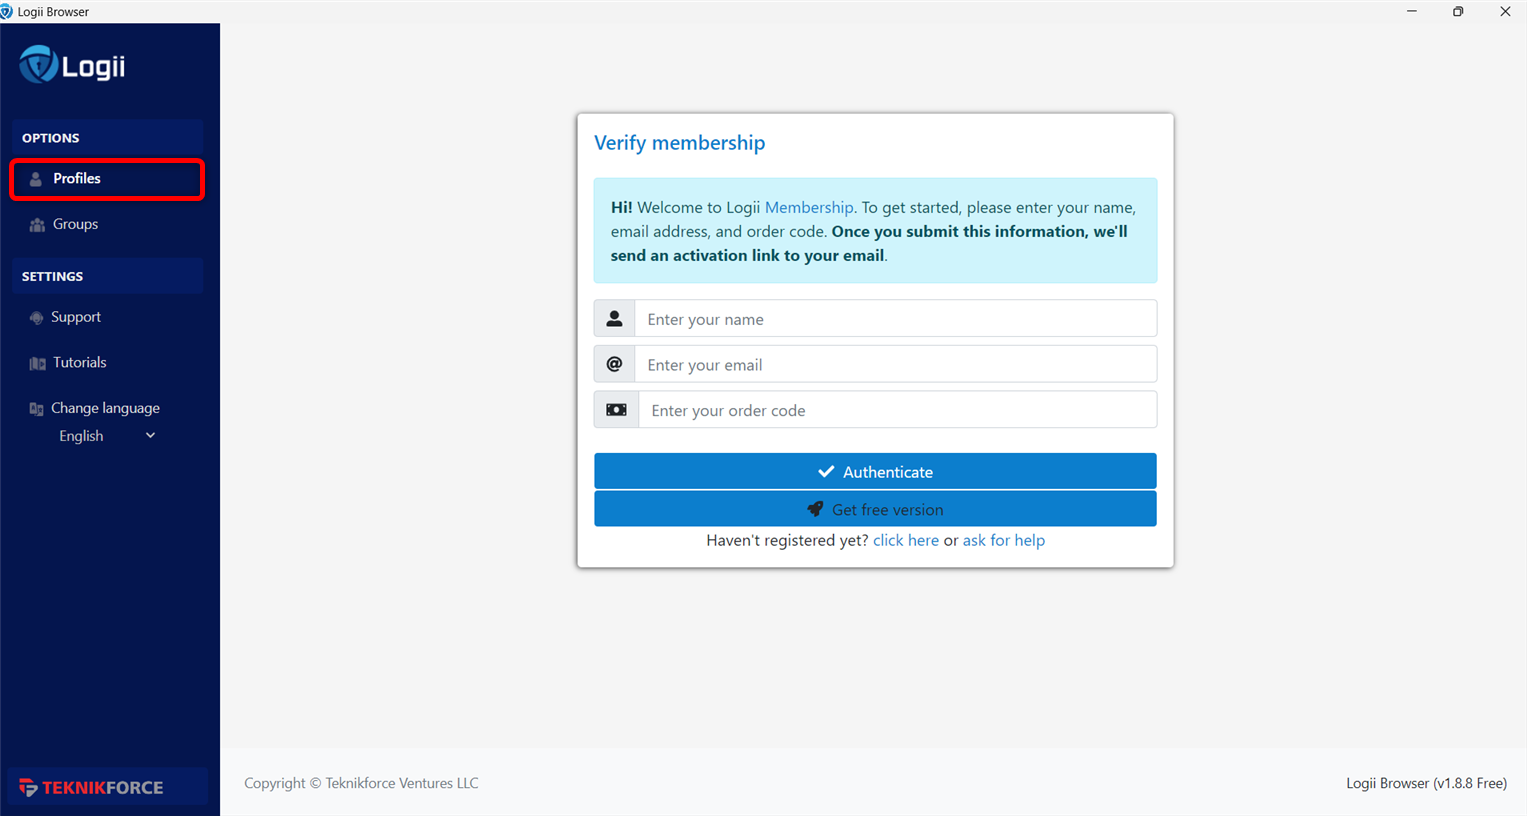
3
Create a profile
Click New Profile to create a new browsing profile.
4
Profile info
Assign a Name to the profile and, under the Proxy Info tab, select Separated data.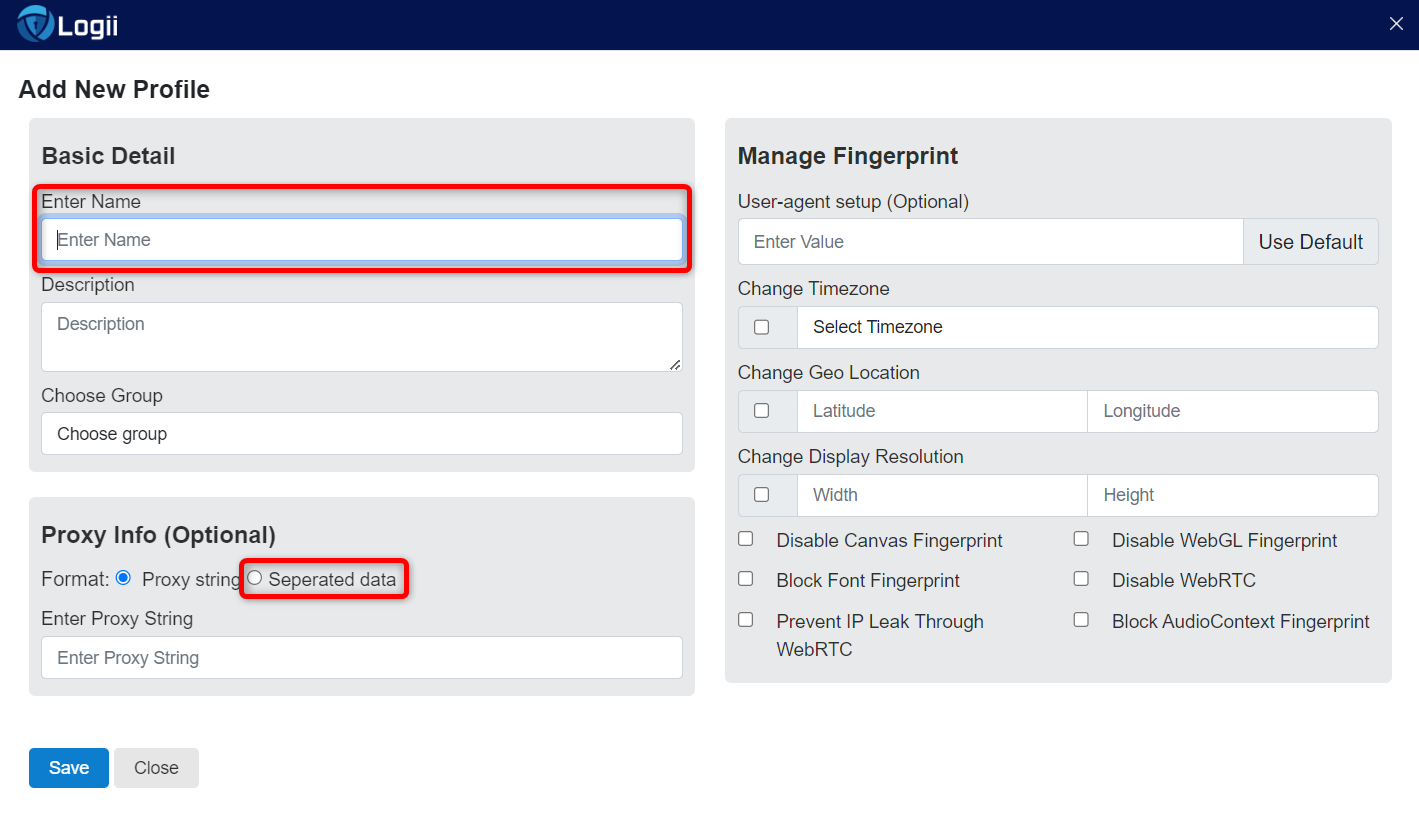
5
Profile proxy
Enter the required proxy details: 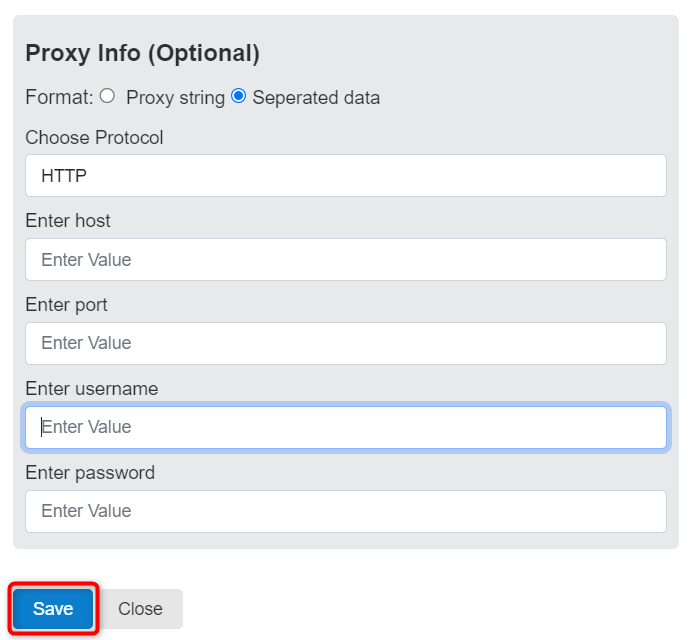
Protocol, Host, Port, Username, and Password, then click Save.6
Finished
Return to the Profile Manager and start browsing with your configured proxy!