What is Che Browser?
Che Browser is a dedicated anti-detect solution that modifies both browser and hardware fingerprints on Windows systems. It enables you to run multiple browser profiles simultaneously, with each one appearing as a distinct device to websites. Incorporating Oculus Proxies boosts your privacy, simplifies proxy configuration, and provides consistent, location-specific connectivity across all sessions.How to Integrate Oculus Proxies With Che Browser
1
Install
Start by downloading and installing the most recent version of Che Browser on your computer.
2
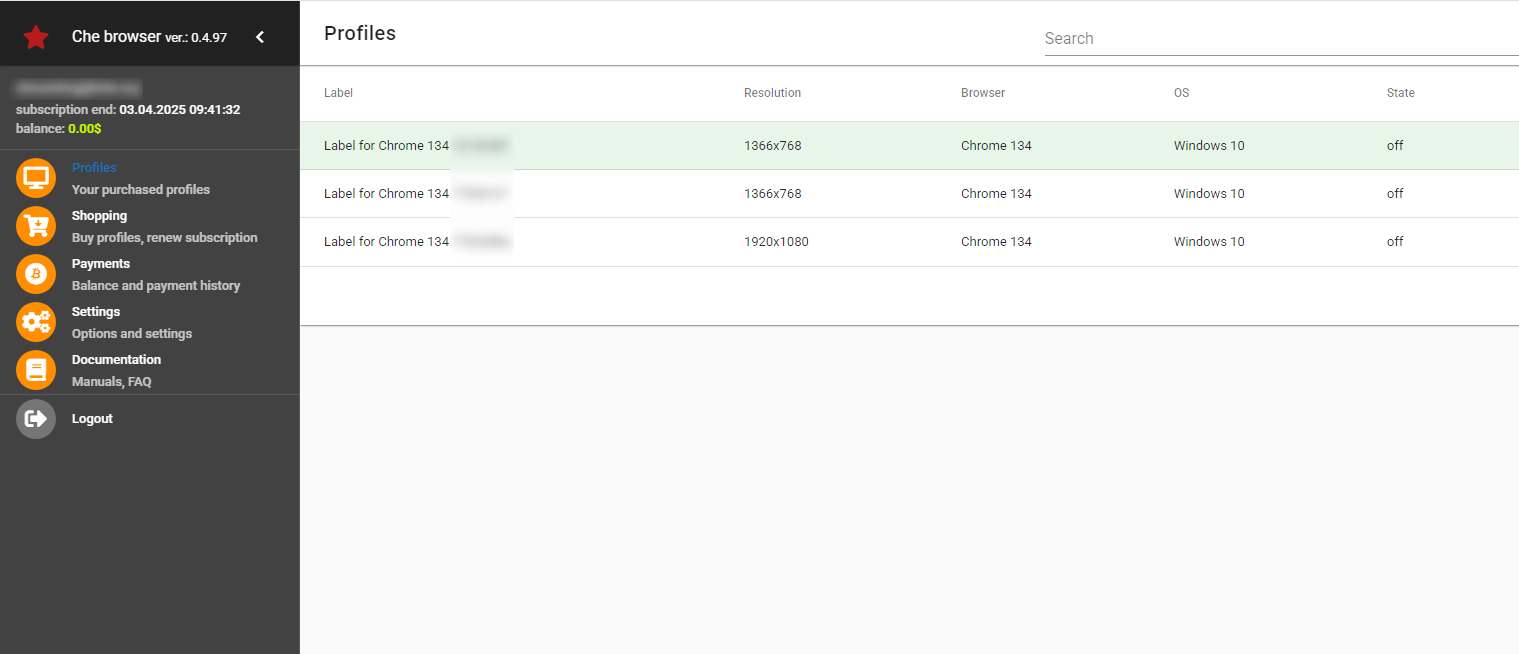
Profiles
Go to the Profiles section and choose the profile you wish to set up.

3
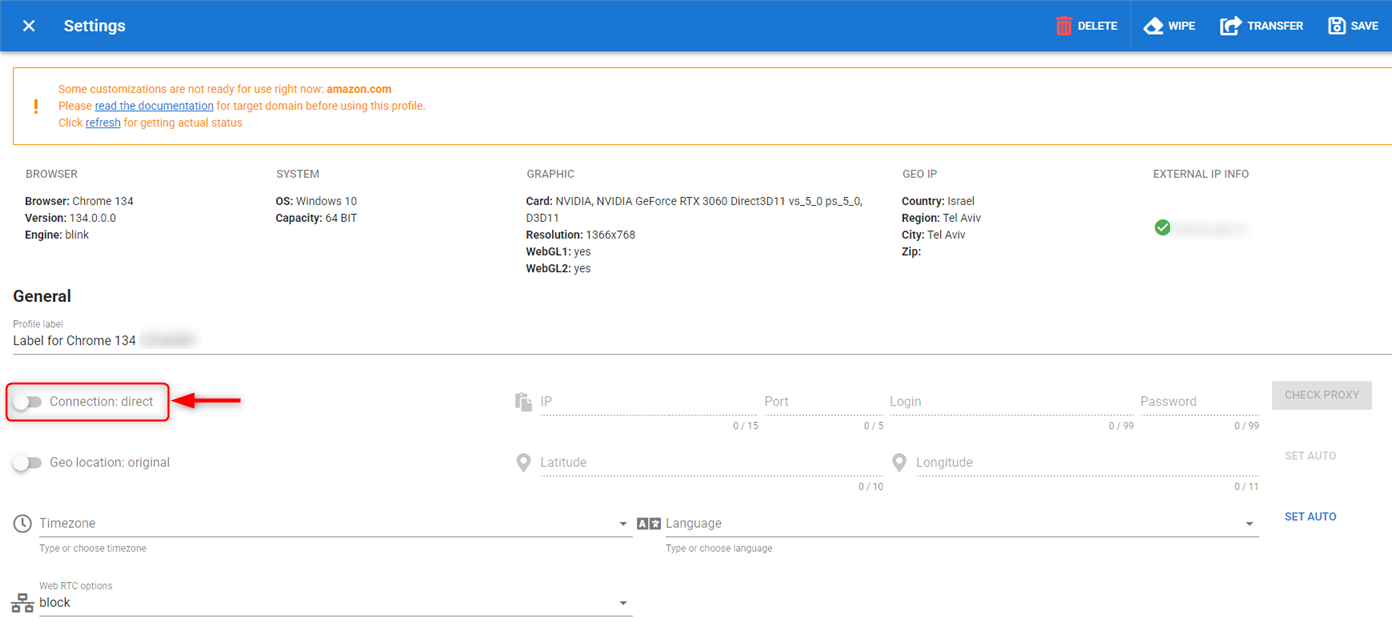
Enable Proxy Connection
Within the profile configuration, enable the option labeled Connection:direct.

4
Fill Proxy Details
Since Che Browser only accepts SOCKS5, make sure to enter port 31115. Provide your proxy details including: 
Host, Port, Username and Password.
5
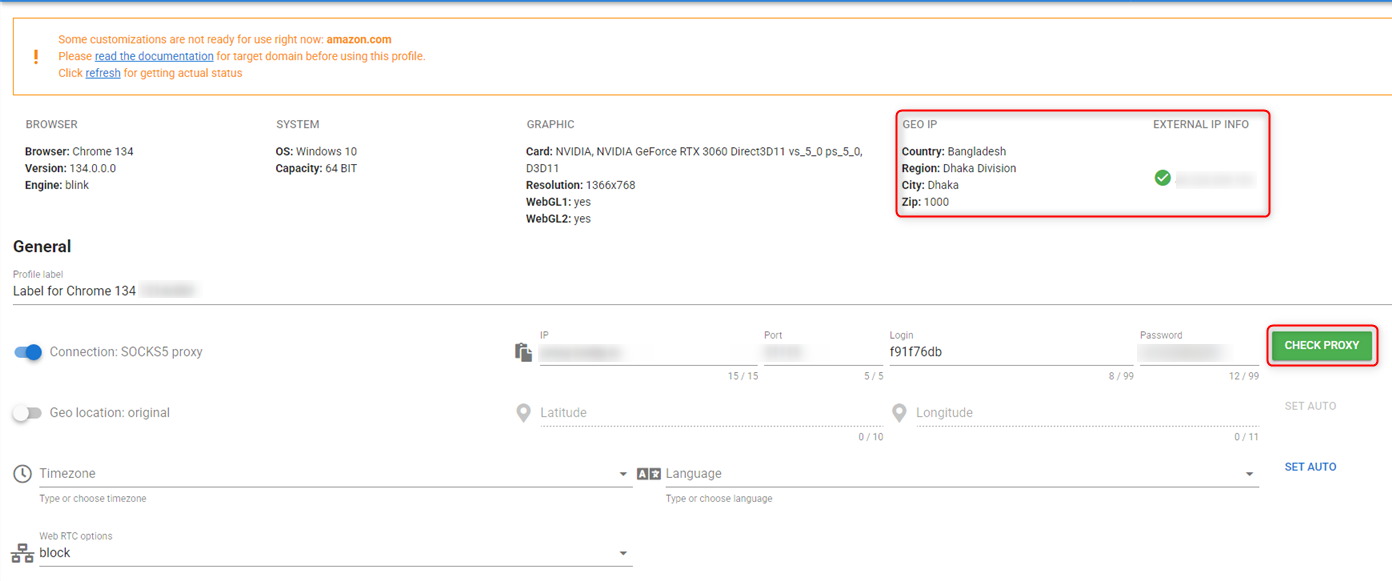
Validate Proxy
Click on CHECK PROXY to confirm the connection — if successful, you’ll see the updated location appear above.

6
Save and Launch
After the proxy has been verified, save your changes and open the browser profile to begin browsing securely.