
How to Set Up a Proxy in Firefox
1
Open Firefox Settings
1. Launch Firefox.2. Click the menu icon (three horizontal lines) in the top-right corner.3. Select Settings from the dropdown menu.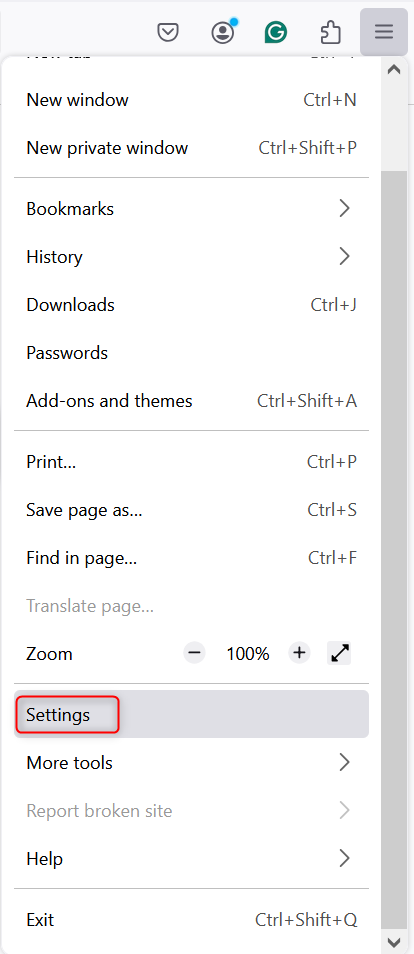
2
Open the Proxy Configuration Menu
1. Scroll down to the Network Settings section.2. Click the Settings button to open the proxy configuration window.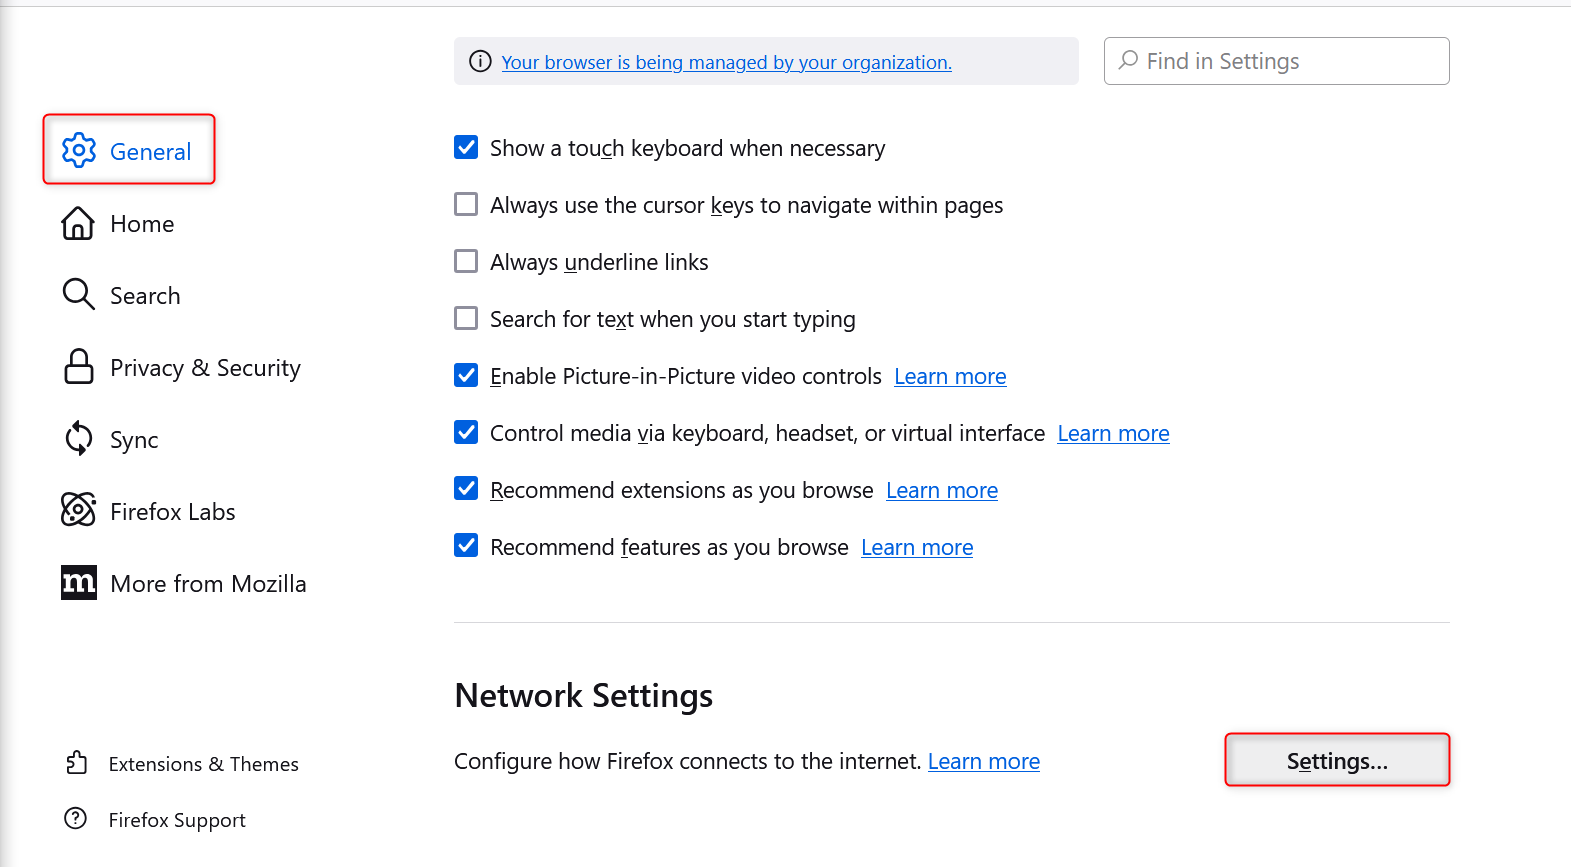
3
Enter Oculus Proxy Details
1. In the proxy settings window, select Manual proxy configuration.2. Enter your Oculus Proxy details: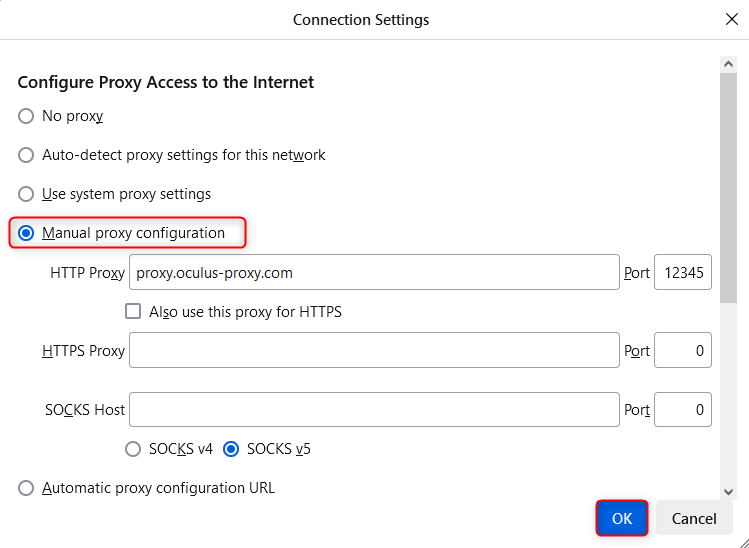
-
HTTP Proxy:
proxy.oculus-proxy.com - Port: Use the port number from your Oculus Dashboard
4
Authenticate When Prompted
1. When accessing a website, Firefox may prompt you for authentication.2. Enter your Oculus Proxy username and password when prompted.