How to Configure Oculus Proxies in Chrome
Enhance your browsing privacy and access restricted content by configuring Oculus Proxies in Google Chrome. Follow this step-by-step guide to set up and manage your proxy settings easily.
If you’re using Oculus to access search engines like Google, Bing, or Yandex and facing connection issues, your proxy type may need adjustment. ISP Premium Proxies provide stable and unrestricted access, preventing blocks that standard proxies might encounter. Switching to ISP Premium Proxies can improve performance.
How to Set Up a Proxy in Chrome
Open Chrome Settings
1. Launch Google Chrome.
2. Click the three dots (menu icon) in the top-right corner.
3. Select Settings from the dropdown menu.
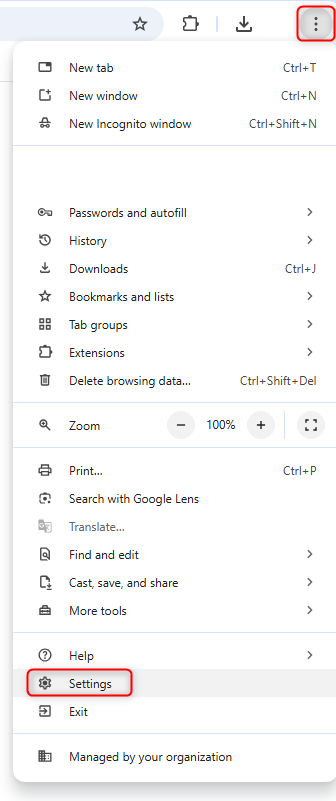
Navigate to Proxy Settings
1. In the Settings menu, scroll down to the System section.
2. Click Open your computer’s proxy settings.
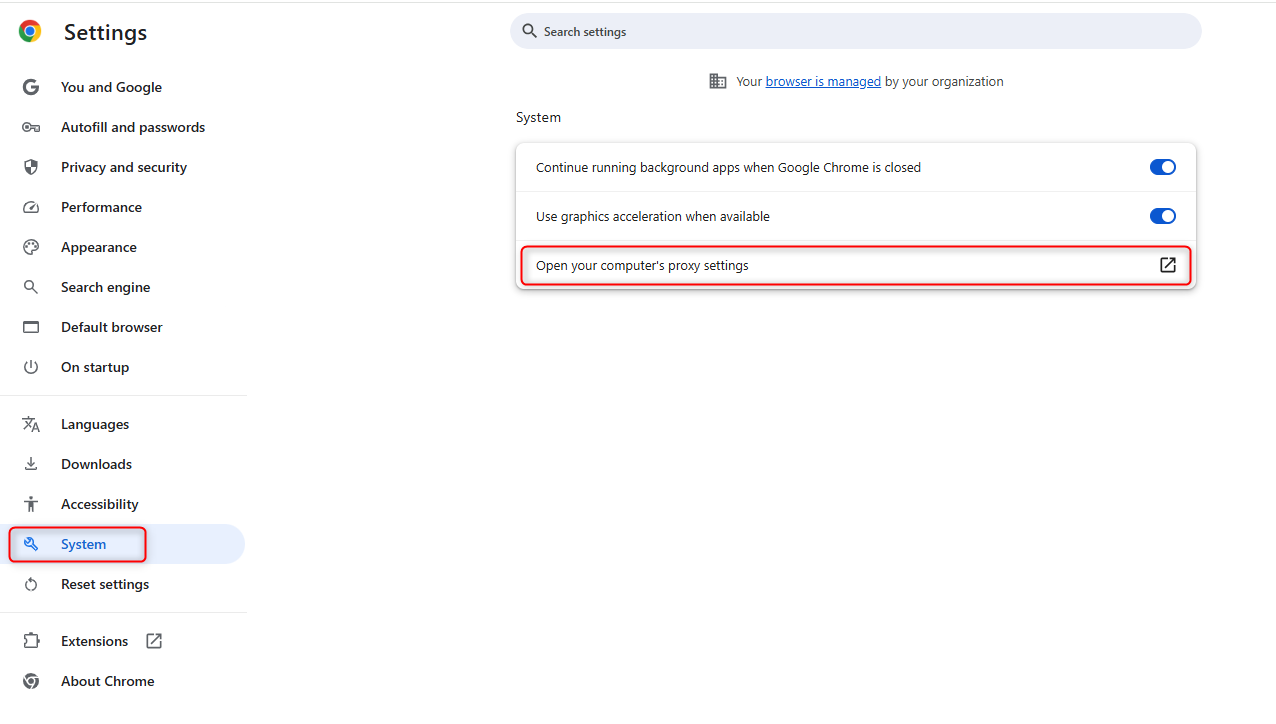
Configure Proxy Settings in Your Operating System
Since Chrome relies on your operating system’s proxy settings, you’ll need to configure them accordingly:
- On Windows:
1. Toggle on Use a proxy server.
2. Enter the proxy address and port from your Oculus Dashboard.
- On macOS: 1. Select the desired protocol (HTTP, HTTPS, or SOCKS5). 2. Input the proxy details, port, and authentication credentials.
If your proxy requires authentication, enter your Oculus Proxy username and password when prompted.
Congratulations! Your Chrome browser is now securely connected through Oculus Proxies. You can now browse anonymously, bypass geo-restrictions, and manage multiple accounts without interruptions. 🚀