
What is GenLogin?
GenLogin is a powerful browser profile management tool designed for professionals who need to manage multiple accounts or workflows. It enables the creation of isolated browser environments, ensuring that each profile operates securely and independently. By adding Oculus Proxies, you can enhance GenLogin’s functionality with reliable and anonymous proxy connections for seamless online activities.How to Integrate Oculus Proxies With GenLogin
Install and Launch GenLogin
1. Visit the GenLogin website and download the application.
2. Install the software on your device.
3. Open GenLogin and log in with your account credentials.
4. If you don’t have an account, sign up to get started.
2. Install the software on your device.
3. Open GenLogin and log in with your account credentials.
4. If you don’t have an account, sign up to get started.
Create or Modify a Browser Profile
1. In the GenLogin Dashboard, click Create Profile to set up a new browser profile.
2. Enter a Name to easily identify it later.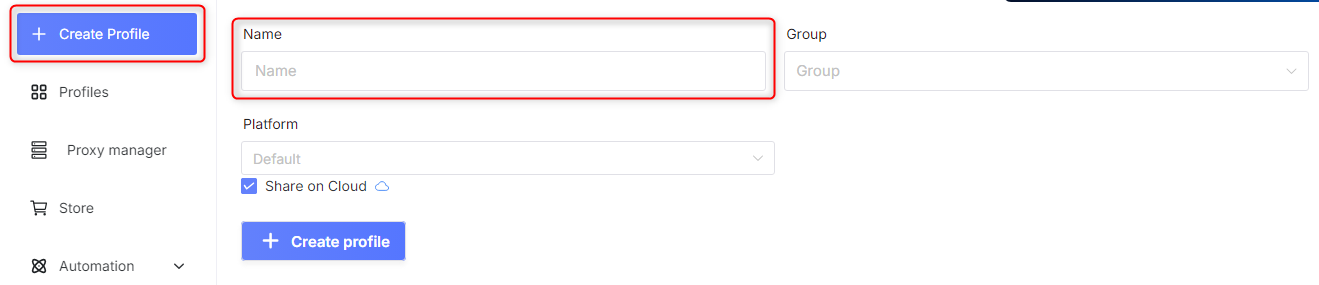
Configure Oculus Proxy Settings
1. Scroll to the Network section within the profile settings.
2. Select Custom Proxy as your network configuration.
3. Enter your Oculus Proxy details: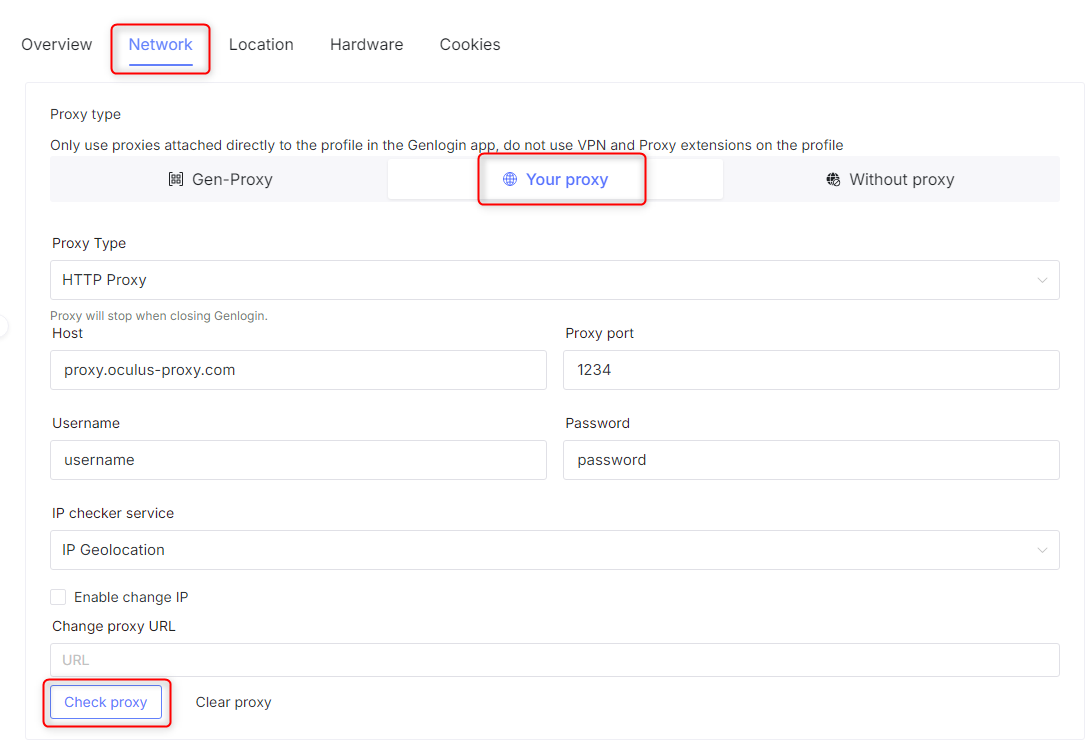
2. Select Custom Proxy as your network configuration.
3. Enter your Oculus Proxy details:
-
Proxy Type: Choose
HTTP,HTTPS, orSOCKS5. -
Host:
proxy.oculus-proxy.com - Port: Enter the port number from your Oculus Dashboard.
- Username: Your Oculus Proxy username.
-
Password: Your Oculus Proxy password.
4. Click Check Proxy to verify that the connection is working correctly.
Save and Launch the Profile
1. Click Create Profile to save the settings.
2. Go to the GenLogin Dashboard and select the newly configured profile.
3. Click Start to open the browser with the configured Oculus Proxy.
2. Go to the GenLogin Dashboard and select the newly configured profile.
3. Click Start to open the browser with the configured Oculus Proxy.
Verify Your Proxy Connection
1. In the GenLogin Browser, open a new tab.
2. Visit httpbin.org/ip to confirm that your IP address matches your Oculus Proxy settings.
2. Visit httpbin.org/ip to confirm that your IP address matches your Oculus Proxy settings.