What is Proxy Rotation?
The Proxy Rotation feature allows you to manually refresh your ISP proxies in the Oculus Proxies dashboard if your current ones aren’t working as expected. Instead of reaching out to support, you can rotate your proxies instantly within your Events & E-commerce ISP Proxies plan. This feature provides greater flexibility and control, ensuring uninterrupted access to your online activities.How to Rotate Proxies in Your Oculus Proxies Dashboard
1
Access Your Events & E-commerce ISP Proxy Plan
1. Log in to your Oculus Proxies dashboard.2. Navigate to your Events & E-commerce ISP Proxies plan.
2
Open the Configured List
1. Find the proxy token you want to rotate.2. Hover over the token and click on Configured list.
3
Rotate Your Proxies
1. In the Configured list section, look for the Rotate Proxies button under the selected format.2. Click Rotate Proxies to proceed.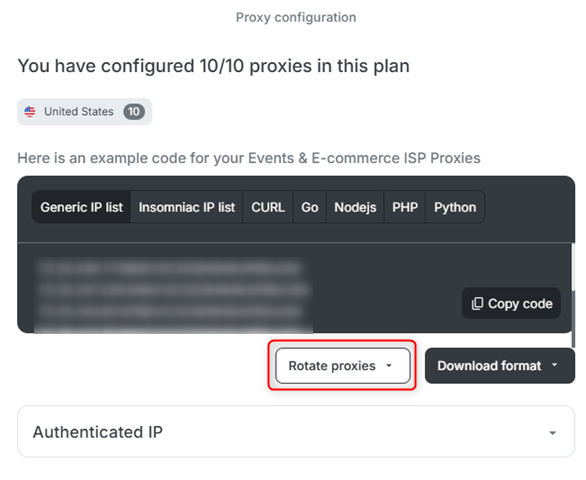
4
Select a New Server
1. A list of available servers will appear.2. Choose a server that best fits your needs and click on it to finalize the rotation.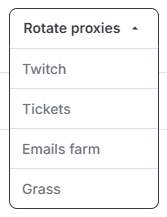
Proxy rotation within specific server categories (e.g., Twitch) depends on availability. If no alternative servers are available, you will need to try again later.
5
Review Rotation Limits
1. Proxy rotation is limited to once per subscription/renewal period.2. If you attempt to rotate proxies again before your renewal, you will see a notification message indicating that rotation is unavailable.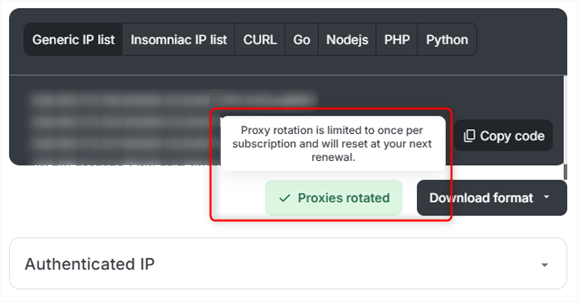
6
Verify Your New Proxies
1. After rotating, test your new proxies to ensure they work as expected.2. You can verify by checking your new IP via httpbin.org/ip.