> ## Documentation Index
> Fetch the complete documentation index at: https://docs.oculusproxies.com/llms.txt
> Use this file to discover all available pages before exploring further.
# How to Set Up Oculus Proxies With SessionBox
> Simplify your multi-session browsing! Integrating Oculus Proxies with SessionBox ensures secure, undetectable, and efficient account management. Whether you're managing multiple online identities or working on complex projects, this guide will help you set up Oculus Proxies with SessionBox seamlessly.
 ## What is SessionBox?
SessionBox makes managing multiple online sessions a breeze, and with its proxy integration, it’s even better! Imagine being able to log into different accounts on the same website, all at once, without any confusion or overlap. SessionBox allows you to assign a different proxy to each session, meaning each one gets its own unique IP address. This way, you can keep all your accounts separate and secure, whether you’re juggling social media profiles, e-commerce accounts, or anything else. It’s like having a different browser for each task, all neatly organized in one place.
If you're using **Oculus** to access search engines like **Google, Bing, or Yandex** and facing connection issues, the proxy type could be the reason. **ISP Premium Proxies** ensure stable and unrestricted access, preventing blocks that standard proxies might encounter. Switching to **ISP Premium Proxies** can help maintain smooth and reliable performance.
## How to Integrate Oculus Proxies with SessionBox
1\. Go to the [SessionBox Chrome Web Store page](https://chrome.google.com/webstore/detail/sessionbox-multi-login-to/megbklhjamjbcafknkgmokldgolkdfig).
2\. Click **Add to Chrome** (or your browser’s equivalent) to install the extension.
1\. Click the **SessionBox icon** in your browser’s toolbar.
2\. Open the menu by clicking the **three horizontal lines** in the top-right corner of the SessionBox interface.
3\. Select **Settings** from the dropdown.
## What is SessionBox?
SessionBox makes managing multiple online sessions a breeze, and with its proxy integration, it’s even better! Imagine being able to log into different accounts on the same website, all at once, without any confusion or overlap. SessionBox allows you to assign a different proxy to each session, meaning each one gets its own unique IP address. This way, you can keep all your accounts separate and secure, whether you’re juggling social media profiles, e-commerce accounts, or anything else. It’s like having a different browser for each task, all neatly organized in one place.
If you're using **Oculus** to access search engines like **Google, Bing, or Yandex** and facing connection issues, the proxy type could be the reason. **ISP Premium Proxies** ensure stable and unrestricted access, preventing blocks that standard proxies might encounter. Switching to **ISP Premium Proxies** can help maintain smooth and reliable performance.
## How to Integrate Oculus Proxies with SessionBox
1\. Go to the [SessionBox Chrome Web Store page](https://chrome.google.com/webstore/detail/sessionbox-multi-login-to/megbklhjamjbcafknkgmokldgolkdfig).
2\. Click **Add to Chrome** (or your browser’s equivalent) to install the extension.
1\. Click the **SessionBox icon** in your browser’s toolbar.
2\. Open the menu by clicking the **three horizontal lines** in the top-right corner of the SessionBox interface.
3\. Select **Settings** from the dropdown.
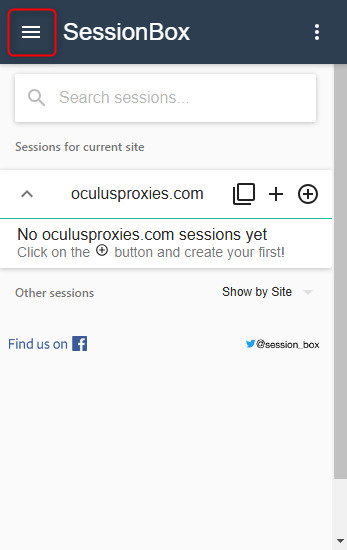 1\. Navigate to the **Proxy** tab in the Settings menu.
2\. Click **Add New** to create a new proxy configuration.
1\. Navigate to the **Proxy** tab in the Settings menu.
2\. Click **Add New** to create a new proxy configuration.
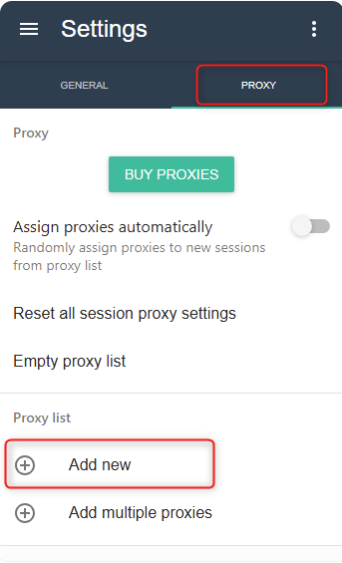 1\. Fill in the following details:
* **Address**: Enter `proxy.oculus-proxy.com`.
* **Port**: Input the port number from your [Oculus Dashboard](https://oculusproxies.com/dashboard/page/plans).
* **Username**: Add your Oculus proxy `username`.
* **Password**: Input your Oculus proxy `password`.
2\. Click **Save** to store the proxy profile.
1\. Fill in the following details:
* **Address**: Enter `proxy.oculus-proxy.com`.
* **Port**: Input the port number from your [Oculus Dashboard](https://oculusproxies.com/dashboard/page/plans).
* **Username**: Add your Oculus proxy `username`.
* **Password**: Input your Oculus proxy `password`.
2\. Click **Save** to store the proxy profile.
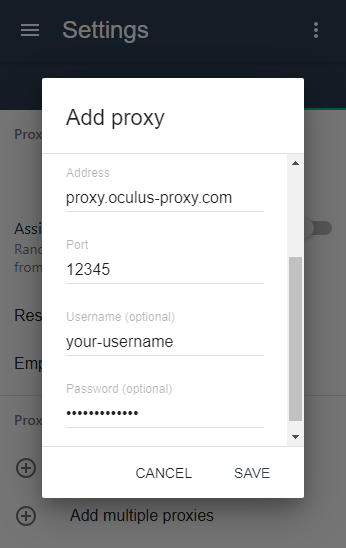 For country-specific proxies, you can enter a format like `your-username-country-US` to receive a US exit node.
1\. Open a website where you want to create a session.
2\. Click the **SessionBox icon** in your browser.
3\. Select **New Stored Session** to create a session for the website.
For country-specific proxies, you can enter a format like `your-username-country-US` to receive a US exit node.
1\. Open a website where you want to create a session.
2\. Click the **SessionBox icon** in your browser.
3\. Select **New Stored Session** to create a session for the website.
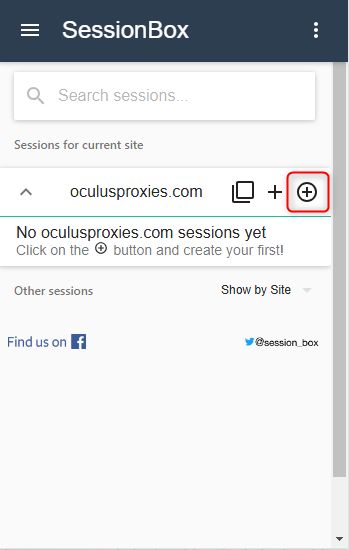 1\. Click the **three dots** next to the session name in the SessionBox panel.
2\. Select **Settings** from the dropdown.
1\. Click the **three dots** next to the session name in the SessionBox panel.
2\. Select **Settings** from the dropdown.
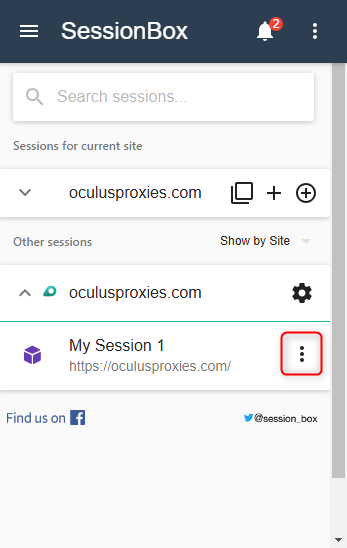 3\. Under the **Other** tab, locate the **Proxy** section.
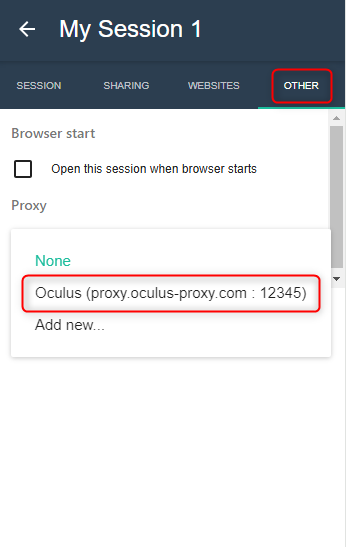
4\. Select the proxy profile you created earlier from the dropdown menu.
3\. Under the **Other** tab, locate the **Proxy** section.
4\. Select the proxy profile you created earlier from the dropdown menu.
 Visit the [SessionBox download page](https://sessionbox.io/download) to download the application. If you don’t have an account, **sign up to create one**.
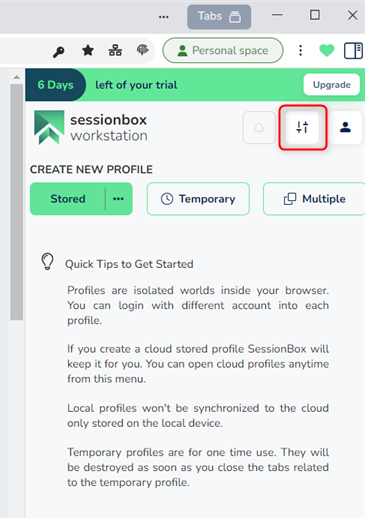
Open the application and open the menu by clicking the **two-bar** icon on the right.
Visit the [SessionBox download page](https://sessionbox.io/download) to download the application. If you don’t have an account, **sign up to create one**.
Open the application and open the menu by clicking the **two-bar** icon on the right.
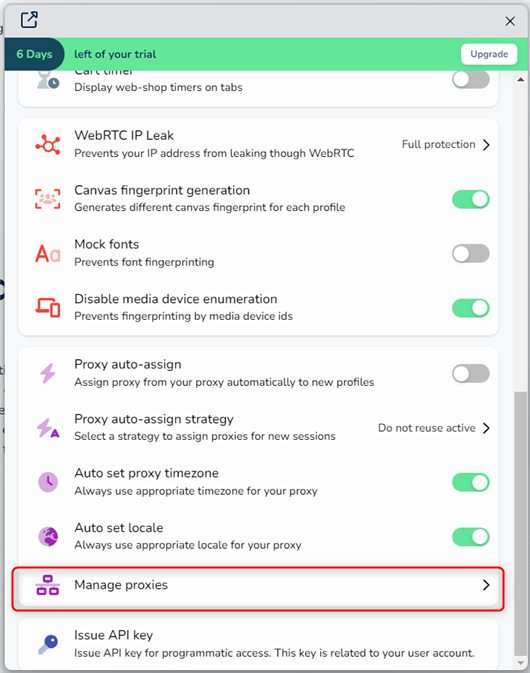
 Press **Manage proxies**.
 Press **Add proxy**.
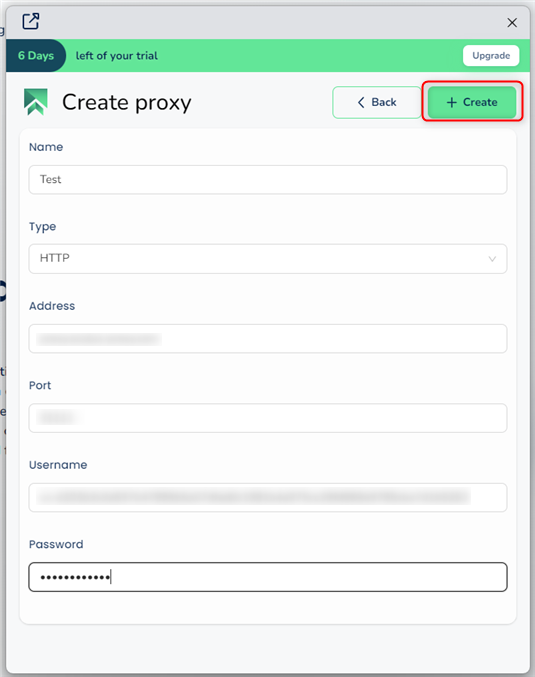
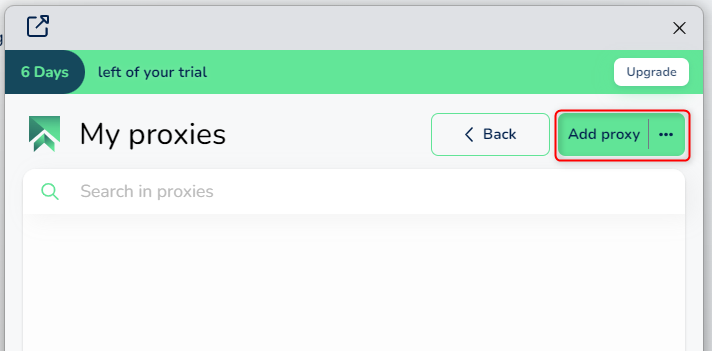 1\. Enter the following details:
* **Name**: A recognizable name for your proxy.
* **Type**: Choose between HTTP, HTTPS, or SOCKS5.
* **Address**: Set to `proxy.oculus-proxy.com`.
* **Port**: Use the port number from your Oculus Dashboard.
* **Username**: Your Oculus proxy username.
* **Password**: Your Oculus proxy password.
2\. Click **Create** to save the proxy settings.
1\. Enter the following details:
* **Name**: A recognizable name for your proxy.
* **Type**: Choose between HTTP, HTTPS, or SOCKS5.
* **Address**: Set to `proxy.oculus-proxy.com`.
* **Port**: Use the port number from your Oculus Dashboard.
* **Username**: Your Oculus proxy username.
* **Password**: Your Oculus proxy password.
2\. Click **Create** to save the proxy settings.
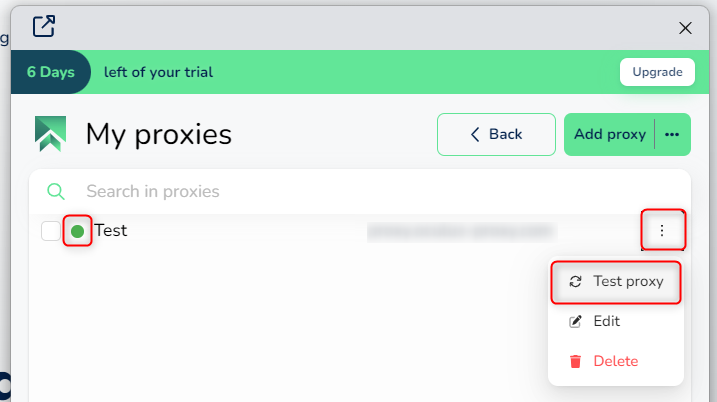
 You're all set! Test your proxy by clicking **Test Proxy** and confirming that a green dot appears on the left.
 **That’s it!** Your Oculus proxies are now successfully configured with **SessionBox**. Enjoy secure, anonymous, and efficient multi-session browsing.